Difference between revisions of "Help:Images"
(last bit changes, and removed construction tag as i think this suffices, will edit this page as needed) |
(thumbnails, other edits) |
||
| Line 1: | Line 1: | ||
:''This article is about image editing help. For image use policy, see [[NeoDex:Image use policy]].'' | :''This article is about image editing help. For image use policy, see [[NeoDex:Image use policy]].'' | ||
An '''image''' - be it a picture, a diagram, or, where appropriate, a photograph - can help illustrate an article's subject. A picture's worth a thousand words, after all - knowing how to put images on articles is an important part of being an editor. | |||
==Using images== | ==Using images== | ||
| Line 8: | Line 8: | ||
|http://images.neopets.com/images/shields/newbie.gif | |http://images.neopets.com/images/shields/newbie.gif | ||
|} | |} | ||
If you put the URL of an image in an article, it automatically turns into the picture itself when the article is viewed. This is a very simply way of including articles from external sources. You can align them left or right with a bit of table code. For example: | |||
<blockquote>{|align=right<br>| | <blockquote><nowiki>{|align=right</nowiki><br><nowiki>|http://images.neopets.com/images/shields/newbie.gif</nowiki><br><nowiki>|}</nowiki></blockquote> | ||
This would look like the image on the right. Doing this quickly shows the image the editor wants and how it can be presented into the article. | |||
However, images should ideally be uploaded to the Neodex's server space instead of being pulled from a different website. This means we have greater control over the image and what we can do with it. Image can be uploaded with the [[Special:Upload|Upload file]] tool. | |||
<br clear="all" /> | |||
===Internal=== | ===Internal=== | ||
[[Image:Newbie Shield.gif|right]] | [[Image:Newbie Shield.gif|right]] | ||
Images uploaded to the Neodex (colloquially ''wikiimages'') should be used in favour of external images. The newbie shield image has been [[Special:Upload|uploaded]] to the Neodex image database with the name "Newbie Shield.gif". This means we can use the following code to replicate what we've done above: | |||
<blockquote>[[ | <blockquote><nowiki>[[Image:Newbie Shield.gif|right]]</nowiki></blockquote> | ||
The result would then be what it looks like to the right. | Instead of "right", "left" or "center" can be used to align the image differently. | ||
[[Image:Newbie Shield.gif|right|frame|This is the [[Newbie]] shield found on a [[User Lookup]] of new Neopets users.]] | |||
The result would then be what it looks like to the right. Different file names refer to different files, but the "Image:" prefix must be kept. We can do more things with a wikiimage than we can with an external image. We can add a frame and a caption like this: | |||
[[Image:Newbie Shield.gif|frame|This is the [[Newbie]] | <blockquote><nowiki>[[Image:Newbie Shield.gif|right|frame|This is the [[Newbie]] shield found on the [[User Lookup]]s of new [[Neopets]] users.]]</nowiki></blockquote> | ||
This puts a little frame around the image and puts a caption explaining what it is underneath it. | |||
[[Image:Neopets 2 layout.png|left|thumb|This image is to big to put in a frame.]] | |||
Sometimes, an image may be too large to include on a page: for example, [[:File:Neopets 2 layout.png|this image]] is 1,583 by 1,301 pixels wide. Instead of including it with the frame property, we instead use the thumb property. This makes it a thumbnail (small version) of the image. | |||
<blockquote><nowiki>[[Image:Neopets 2 layout.png|left|</nowiki>'''thumb'''<nowiki>|This image is too big to put in a frame.]]</nowiki></blockquote> | |||
< | |||
Readers can click on the thumbnail to bring up the larger image on the file page. Thumbnails can be made to be specific sizes, for example, adding "200px" would make the thumbnail 200 pixels wide. | |||
<blockquote><nowiki>[[Image:Neopets 2 layout.png|left|thumb|This image is too big to put in a frame.|</nowiki>'''200px'''<nowiki>]]</nowiki></blockquote> | |||
As long as the first thing that's specified is the image name - with the "Image:" prefix, the other properties can be set in any order. Properties must be divided by vertical bars - on most US and UK keyboards, these can be typed by pressing shift and backslash ("\"). | |||
==External links== | ==External links== | ||
Revision as of 20:41, 20 May 2012
- This article is about image editing help. For image use policy, see NeoDex:Image use policy.
An image - be it a picture, a diagram, or, where appropriate, a photograph - can help illustrate an article's subject. A picture's worth a thousand words, after all - knowing how to put images on articles is an important part of being an editor.
Using images
External
|
If you put the URL of an image in an article, it automatically turns into the picture itself when the article is viewed. This is a very simply way of including articles from external sources. You can align them left or right with a bit of table code. For example:
{|align=right
|http://images.neopets.com/images/shields/newbie.gif
|}
This would look like the image on the right. Doing this quickly shows the image the editor wants and how it can be presented into the article.
However, images should ideally be uploaded to the Neodex's server space instead of being pulled from a different website. This means we have greater control over the image and what we can do with it. Image can be uploaded with the Upload file tool.
Internal

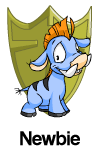
Images uploaded to the Neodex (colloquially wikiimages) should be used in favour of external images. The newbie shield image has been uploaded to the Neodex image database with the name "Newbie Shield.gif". This means we can use the following code to replicate what we've done above:
[[Image:Newbie Shield.gif|right]]
Instead of "right", "left" or "center" can be used to align the image differently.
The result would then be what it looks like to the right. Different file names refer to different files, but the "Image:" prefix must be kept. We can do more things with a wikiimage than we can with an external image. We can add a frame and a caption like this:
[[Image:Newbie Shield.gif|right|frame|This is the [[Newbie]] shield found on the [[User Lookup]]s of new [[Neopets]] users.]]
This puts a little frame around the image and puts a caption explaining what it is underneath it.

Sometimes, an image may be too large to include on a page: for example, this image is 1,583 by 1,301 pixels wide. Instead of including it with the frame property, we instead use the thumb property. This makes it a thumbnail (small version) of the image.
[[Image:Neopets 2 layout.png|left|thumb|This image is too big to put in a frame.]]
Readers can click on the thumbnail to bring up the larger image on the file page. Thumbnails can be made to be specific sizes, for example, adding "200px" would make the thumbnail 200 pixels wide.
[[Image:Neopets 2 layout.png|left|thumb|This image is too big to put in a frame.|200px]]
As long as the first thing that's specified is the image name - with the "Image:" prefix, the other properties can be set in any order. Properties must be divided by vertical bars - on most US and UK keyboards, these can be typed by pressing shift and backslash ("\").