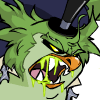
The Tale of Woe
The Tale of Woe, or the Haunted Woods Plot, was a plot set in the Haunted Woods that began on 2 October 2006, and concluded on 20 November 2006. It introduced the town of Neovia, whose residents were transformed into monsters when they discovered a potion that promised their hearts desires.
It starred Gilly of The Castle of Eliv Thade fame, and Sophie who had previously featured in the Neopets: The Darkest Faerie video game. It introduced Bruno and the mysterious Hissi oil salesman Mr. Krawley, who taught the Neovians to be satisfied with what they had. In participating in this plot, players took on the roles of the lead characters and helped them surmount the obstacles they face in the story.
The plot used the framing device that it was a tale being told to the player by a mysterious Pink Elephante they met at the gypsy camp - who in fact is Mr. Krawley in disguise. Nested within this story, the Pink Elephante appears again to tell Gilly about the history of Neovia.
Synopsis
A mysterious stranger, Mr. Krawley, visited the town of Neovia with a potion that promised to fulfil anyone's heart's desire - but it transformed the townsfolk into twisted, monstrous versions of their desire for their greed. Desperate to save themselves, they made a deal with the Spirit of Slumber, who 'cured' them of the potion by making the entire town into ghosts that only appeared once a year on Halloween.
Ten years later, after hearing the story of Neovia, Gilly accidentally reunited the only two survivors, brother and sister Bruno and Sophie and together they find a way to summon the Spirit and undo his spell. The Neovians were restored to life, but were still the monsters the potion made of them. Thanks to the surprising assistance of Mr. Krawley himself, Gilly and Sophie were able to devise the potion's antidote.
Story
Gilly was lost in the Haunted Woods. As night drew in, she found shelter at a Gypsy Camp. There, she met a mysterious Pink Elephante with glittering, golden eyes. He offered to read her a story before she went to sleep.
Somewhere in the Haunted Woods was a quiet town called Neovia. A Gelert named Bruno lived there, who was was besotted by Lily, a local Pink Aisha. Bruno wasn't strong enough or charming enough to win Lily's affections from her boyfriend Oscar, and thought that he would always be lonely.
One day, he met a stranger to the town, a Krawk with bright gold eyes. He offered to sell Bruno a potion, Hissi oil, that would fulfil all his desires. Overnight, the potion made Bruno stronger and more confident.
Bruno wasn't the only Neovian to be offered the potion. His father, Edmund, found it made his business a success again and his debts disappear, and his younger brother Reginald found the potion made him smarter. They encouraged their friends and neighbours to try Mr. Krawley's potion, and all their wishes - from being taller, or more beautiful, or younger - began to be answered. Only the innocent, like Bruno's sister Sophie, who wanted for nothing, didn't drink the potion.
The effects of the potion did not end there, however. Bruno kept becoming stronger and stronger, until he was a grotesque muscular monster; Edmund became paranoid that people would want to steal his new fortune; Reginald become so intelligent that no one else could understand him any more. The entire town began to suffer for their greed and wanted answers from Mr. Krawley - but he had disappeared. The town turned their anger on Bruno and his family instead.
While Bruno distracted the mob, Reginald smuggled their sister Sophie, the only one unaffected by the potion, out of the town and into the Woods. The Earth Faerie Ilere appeared to them, and took Sophie away to care for her. Reginald returned to Neovia and hid with his parents as the towns people drove Bruno out of Neovia.
Mayor Thumburt managed to stop the mob before it turned on itself, and together they summoned the Spirit of Slumber, a powerful ghost who haunts the Woods. He agreed to end Neovia's suffering, but for a "terrible price".
The story at an end, Gilly went off to sleep. The next day, she left the camp and ventured back into the woods.
Following a path out of the camp, Gilly found herself at the town from the story, Neovia. It was deserted, and in a burnt down house, she found a silver locket. She wanted to return it to its owner. She found a shack in the Woods, and asked the witch who lived there if she knew anything about the locket or Neovia. The witch snatched the locket and shooed Gilly away, threatening to turn her into a stink beetle.
It started raining and Gilly took shelter in a cave. Inside, a monstrous Gelert was frightened by its own reflection and chased Gilly from the cave. She ran back to the witches shack, and made a shock discovery: the Gelert was Bruno from the story, and the witch was Sophie, his little sister. The siblings were amazed to see each other again.
They swapped stories - Bruno had hidden in a cave to escape the townspeople and had lived there ever since, while Ilere took Sophie to the shack and gave her a magical chest of supplies to live off. Sophie had discovered that since that final night, the Neovians had disappeared from the town. They only appeared on Halloween as intangible, ghost-like beings. "Their faces were entirely blank, and their bodies looked like they were only going through the motions."
Sophie had spent the last ten years trying to devise a cure, but had had no success. Gilly remembered the Elephante's story and realised that this must have been what the Spirit of Slumber did. Sophie decided to ask Ilere if she knew anything about Spirit of Slumber - and at Bruno's insistence, Gilly was allowed to come along too.
After navigating the swamp, climbing down a cliff face, and encountering some Ghost Meepits, they finally came to Ilere's tree. They explained that they wanted to find the Spirit of Slumber to cure Neovia, but Ilere didn't want to help at first. Sophie had to break up a fight between Ilere and Bruno, and Ilere saw how strong her charge had become. The Spirit, she said, had once been a Neopet, but he became a powerful spirit of the Haunted Woods when he died.
They went in search of more information from other denizens of the Haunted Woods. The Brain Tree agreed to tell them the Spirit's real name if they told him when he died, but the Esophagor could only tell them when someone died if they told him their real name. Sophie came up with another solution - they had to dig up every grave in the Haunted Woods. She had a potion that would tell her when they found the right bones.
They enlisted the help of the Caretaker to help find all the graves - but his indices had been stolen. They managed to recover them from a maze and the Caretaker guided them through the graveyards.
After exhuming many graves, they finally found a bone that glowed silver when exposed to Sophie's potion - they had found the Spirit's grave, but the headstone was broken. Reluctantly, they came to a conclusion: they would have to go through the Caretaker's register and cross off the names on every other grave. The remaining name had to be the Spirit of Slumber's.
Now they knew who he was in life, Sophie could prepare a potion to summon the Spirit. One of them would have to drink it, though, and become possessed by the Spirit - Bruno volunteered, and Sophie reluctantly agreed.
The Spirit, speaking out of Bruno's body, agreed with a sly smile to reverse his spell. As they walked to Neovia, Sophie reassured Gilly there weren't any Werelupes in that part of the Woods. Gilly reassured Sophie their plan would work.
It was Halloween, and the ghostly impressions of the Neovians were roaming the town. The Spirit undid his spell, and they all began to become solid again. Sophie was thrilled - her parents were back to normal.
But only for a moment. As soon as they stopped being ghostly, the townspeople transformed back into the twisted versions of themselves Krawley's potion had created. The Spirit had undone his spell, but only that - he hadn't undone the potion as well. Before her eyes, Sophie's parents became monsters again, and she fled, leaving Bruno and Gilly to fend for themselves.
The crowd of Neovians turned on them, just as Bruno spotted a familiar pair of gleaming golden eyes. Mr. Krawley was on the other side of the crowd - he sent Gilly to follow him as he held back the mob.
Mr. Krawley led her through a graveyard where the gravestones came alive with gnashing teeth. When she had fought he way through those, she reached trees that grew eyes and mouths at Mr. Krawley's touch, and swung swords made of wood at her.
She caught up with him at last at Meepit Oaks, an abandoned asylum. He said he had led her there because she needed something from inside. She ran inside to escape from the hoard of Zombies coming up behind her. Inside she found the skeleton of a nurse, and growing from her a single, glowing flower. She took it with her when she left.
Bruno managed to escape from the mob, despite Mayor Thumbert's urgings. From his hiding place, he saw his own parents were among those who had turned against him.
Sophie ran all the way back to her shack, where she collected herself and started preparing a potion to reverse Krawley's Hissi oil. She finished a concoction, but couldn't help but think it was missing something. On her way back to Neovia, she ran into Gilly - and recognised the flower she had found as the final ingredient.
Sophie blasted her way through the townspeople with her magic until she reached the well. The mayor tried to stop her pouring her cure into the water supply, and as they fought grew stronger and stronger. With Bruno and Gilly's help to distract him, Sophie was able to transform him into a Moquot.
The well water dosed with Sophie and Gilly's cure, they decided to return the next day when everyone in the town had had a chance to drink it. Sure enough, everyone was restored: no longer the Spirit's apparitions, and no longer Krawley's twisted versions of their own desires.
Bruno could not be cured - Sophie thought he had been under the effects of the potion too long, but he revealed he actually didn't mind looking like that. Edmund welcomed back his son anyway - their family would be together again, and that was what was important.
Sophie made her apologies - Neovia just was not her home any more. Nevertheless, at long last, her family was restored.
Gilly saw Mr. Krawley watching the happy reunion from the shadows - the people of Neovia had learnt that there were no easy fixes to their problems. He vanished in a puff of smoke.
Participation
While participating in this plot, players took on the roles of the main characters, resolving the problems they face as the story developed. By participating, players learnt more about the events of the plot that weren't explored fully in the narrative.
When the player had completed each step but before the next step had been released, they saw a "To Be Continued..." message. After the next step was released, this became an arrow labelled "Continue...".
This plot featured a Quest Inventory, a separate inventory where items relevant to the plot were stored. Items in this inventory could not be used, traded, or stolen like items in the user's inventory can. In previous plots like the Lost Desert Plot, puzzle items that were discovered could be stolen like normal items, but retrieved again by revisiting the page that had given them.
The locket
After the final part of the prologue story was released, players could follow a path past the Gypsy Camp and find the deserted town of Neovia. There was only one part of it they could explore, the burnt down ruin of the house that Bruno and his family used to live in.
The player had to investigate the house and find a lost locket. They could click on every pixel in the image, but there were only ten parts of the house the locket could be hidden in. Which location it was in was random for each user. The different locations were:
- (67,201) -- Chair
- (80,135) -- Fireplace
- (147,218) -- Couch End
- (150,115) -- Bookcase
- (175,145) -- Crack in the Wall
- (186,186) -- Sofa Couch
- (210,130) -- Broken Staircase
- (235,232) -- Broken Boards
- (308,199) -- Pillow Spring
- (364,195) -- Table Leg
The player could input the co-ordinates directly into the URL - http://www.neopets.com/halloween/hwp/neovia.phtml?hvh=[House Code Identifier]?[x,y] to visit the locations quickly.
After the locket was found, the player had to take it to the Deserted Fairground, where Gilly could ask the following four characters if they could help her identify it.
- Harker the Lupe, at the Bagatelle stall.
- Lyanka the Aisha, at the Cork Gun Gallery.
- Leeroy the Quiggle, at the Coconut Shy.
- Ssidney the Nimmo, at Ssidney's Scratchcards.
The conversations appear bellow the games themselves. Each of the characters would say one of four things at random. For the player to proceed, they had to visit the carnies in a certain order, so as to have the conversations in a certain order. The four possible conversations began with the following opening lines:
- "Why, certainly, little miss... Well, what a pretty little trinket this is. I haven't seen one like it in years."
- "Amazing! I haven't seen such metalwork in, oh, must be ten years. Where did you say you found it?"
- "That piece of junk? It looks like a hundred other lockets I've seen."
- "It looks familiar... where did you get it? I know someone who'd pay a thousand Neopoints for that locket, though. At least, I used to. Haven't seen her in ages."
The player had to hear the conversations in that order - beginning with the conversation that used the word "one", then the conversation that used the word "ten", "hundred", and then "thousand". When the characters are visited so that the conversations appear in the above order, Gilly will decide that nobody will help her there. Back in Neovia the player can now follow another path to Sophie's Shack.
Bruno's Cave
After visiting Sophie's Shack, Sophie shooed Gilly and the player away. Fleeing in terror took Gilly to a dark cave.
The cave is unique to everyone, but consists of a 3 x 3 grid of rooms, which all have at least one doorway into them. In the cave, there are several items, some of which can be carried and some of which can't. The chest and the table cannot be picked up, but the lamppost, chair, mirror, rotten food, and key can. Additionally, at least one of the rooms will have a pool of moonlight in the centre.
The user can pick up one object at a time, and can be placed down at a certain co-ordinate in the same way as the user searched for the locket in Neovia.
When moving about the cave, occasionally the message "Something seems to be following you..." will appear under the picture of the room. A creature would eventually catch up with you, and it will scare Gilly into a random room.
Gilly could lay a trap for creature by rearranging the furniture. If the rotten food was placed in any room except for the room with the garbage, the creature would stop and eat, but become nauseated and dizzy. If the mirror was in right place, the creature would see their reflection, panic and flee. If the lamppost was in the correct place, they would trip over it, and if the chair was in the right place, when it tripped, it would hit its head and lie on the floor in a daze. If all this was done in the moonlight room, Gilly would be able to see the creature - it was Bruno.
The user must set up a trap in a moonlit room in order to illuminate the creature. To do this, they had to place the following items in the room with the moonlight shining in. They had to be placed in the correct positions, within ten pixels.
- Mirror at (240,330);
- Lamppost at (240,215);
- Chair at (235,160);
- Rotten food anywhere in the room.
When the monster follows Gilly into the room, it will eat the bait, see its reflection in the mirror, stumble backwards over the lamppost, crack its head on the chair and collapse into the light.
Finding Ilere
When the player returned to the shack, Bruno, Gilly, and Sophie were reunited and set off in search of Ilere. On their way, they had to pass through the swamp, the high woods, and the deep woods. Each section was a Flash maze, consisting of several 'rooms' linked together by paths.
As the player explored each area, they had to collect items to help them proceed.
The Swamp
The Swamp had five different areas. In one of them, there was a Two-Headed Hissi blocking the path out of the swamp. When the user clicked on him, they were told that one of the Hissi's heads will always speak the truth, and the other will always lie. This seems like a set up to a knights and knaves logic puzzle, where the player has to figure out which head to trust based on a clever question. However, the Hissi was too busy arguing with himself to listen to any questions you give it, so the problem cannot be solved in that way.
The user must find a stick in the maze, and click on it to bring it into their Quest Inventory. They then must return to the Hissi and, by clicking on the stick in the inventory then on the Neopet, prod it. One of the Hissi's heads will deny that it was poked, so the other head must be telling the truth. This opens the way into the next section.
The High Woods
In this segment, there were twenty different areas. In one of them, there was a clearing somewhere in where there was a break in the trees. The next section is at the bottom of the cliff in this clearing.
Around the maze are five types of vine, six of each, which can be picked up in the same manner as the stick in the previous section. These vines must be braided together in a certain combination to construct a rope for a descent of the cliff. Each type of vine was given a particular strength between one and five, assigned at random for each player. The rope the player braided together had to have an average strength of above 3.5 to support everyone's weight.
To make matters more complicated, the player had to make sure that the vines they combined were also long enough to reach the bottom of the cliff. Exactly how tall the cliff is was also different for different players. If the player made it too long, a monster at the bottom of the cliff would grab it and pull it away, and the player would have to go back through the woods to find more vines.
An effective way of determining which combination to use is to drop all vines at the clearing by clicking them in the inventory and clicking on the terrain, putting them into piles of type, and then trying with six of each in one's inventory until the user is shown a cutscene of the cliff, where the rope is too short. The user should add a vine from the next pile to the inventory, and continue doing so, testing after each vine, until the rope becomes too weak or the bottom is reached. In the former event, the last vine added should be removed, and a vine from the next pile included, with the process continuing.
Once the vine-rope reaches the base of the cliff, the three Neopets could climb down and begin exploring the Deep Woods.
The Deep Woods

In the Deep Woods, there were thirty different areas. In one of them, the player found the doorway to Ilere's residence, but needed to solve a magical combination lock to go inside. The lock was opened by seven Ghost Meepits that the player had to find in this part of the Woods.
When the user first encountered a Meepit in the forest, it would run away. In order to collect it, they needed to offer it Meepit Juice. The player had to send a score of 400 points or more at the game Meepit Juice Break. This placed a glass of Meepit Juice into the Quest Inventory.
The next time a Meepit is encountered, clicking on the Juice in the inventory, then clicking on the Meepit, will offer the juice to the Petpet. The juice will splash through it, however, and the Meepit would run off again. Sophie realised that she could turn the juice into Ghost Meepit Juice, and maybe they could drink it then. When fed Ghost Meepit Juice, the Meepis became entranced and followed as part of the Quest Inventory.
All seven Meepits had to be taken to Ilere's tree. The only way to lower the stone barricade was to put the Meepits on the seven spots of light in front of tree. Clicking on the Meepit picture in the Quest Inventory, then on the floor, would cause the seven Meepits to hop onto the spots. However, the each Meepit had to go to a specific spot - player could rearrange the Meepits by clicking on two of them to swap their positions until they got the right combination. A Meepit who was in the correct spot would dance, a Meepit that was one spot away would look happy, a Meepit that was two spots away would stare, and a Meepit that was three spots away would look sad.
When all the Meepits were dancing, the stone door will move and Ilere's home will be open.
Fetching the books
After meeting Ilere, Sophie decided she could summon the Spirit of Slumber if she could find his bones. When the player visited the Game Graveyard, they discovered the Caretaker's shack there, owned by an angry Yurble who looked after all the burial records. However, the records had been stolen by thieves.
To recover the books, the player had to play a game of Fetch! on hard mode. Ignoring what the Master asked them for, the player could find somewhere in the maze a pile of books. Reaching these would add them to the Quest Inventory and they could be taken back to the Caretaker. He had to look over them before he was ready to let Bruno, Gilly, and Sophie read them.
Gravedigging
The next puzzle was collaborative, involving lots of players working together to exhume graves and test the bones. There were three parts to this puzzle - finding ingredients, digging up the graves, and testing the bones. The tasks were not performed in sequence like the puzzle to find Ilere - the player could choose to do any of them in any order any number of times, although they had to wait five minutes before performing the same task again.
This step began on 20 October and finished on 23 October, when the Spirit's bones were finally identified. Together, players dug up 129,764 graves and tested 129,700 bones to find the right one.
When the Caretaker was satisfied that his records were complete, he could show players to some of the graveyards. Each graveyard was given a complicated name of random letters and numbers, "according to a complex coordinate scheme that [the Caretaker] devised" but would not explain. He gave the player a list of 25 - 30 graveyards, and when a graveyard was fully explored, he removed it from the list and replaced it with another.
Clicking the 'Enter graveyard' button brought the user to a map of the graveyard. Each graveyard was divided up into many squares. The square the user was currently on had a black border around, and the player could move around by clicking other squares. The user could only click on squares they could reach from their current position without walking over graves or barriers.
Many of the squares contained gravestones. If the gravestone had a small pile of dirt in front of it, it signified that the digging was underway. If there was a large section of dirt in front of it, it signified that the grave was open and had already been tested. If there was a large section of dirt with bones in front of it, it signified that the grave was open and the coffin exposed, but the bones hadn't been tested yet. If there was no dirt in front of it, digging had yet to begin (although diggers may be waiting to commence).
Finding ingredients
Sophie needed ingredients in order to produce the bone-testing potion. She would give a player an ingredient she needed and sent them to her shack to bring it to her. Unfortunately, the bottles on the shelf in her shack were unlabelled, and it took some trial and error for players to figure out which bottle was which. Sophie started off asking for one of eight ingredients, and then asked for different ones several hours later. The next day, she asked for a third group of reagents. Two of the bottles - Slorg Slime and Water Dung - were never used.
| Sophie's ingredients (left to right) | ||
|---|---|---|
| Top Shelf | Middle Shelf | Bottom Shelf |
|
||
If the player returned with the correct ingredient, they were rewarded with 50 Neopoints.
Exhuming graves
| Digging prizes |
|---|
|
To interact with a grave, the user had to be on a square adjacent to one, then click the grave's square. To dig up a grave, there had to be exactly four users (represented by their active Neopet) at the grave site. When a digging team of four was assembled, they had to dig in sequence, with each user's turn indicated to them by a pink highlight around their Neopet. To join a digging team, there had to be at least one empty space. Between their turns at digging, the users clicked the "Wait" button.
A player had fifteen seconds to dig when it was their turn, or they would be skipped. If a player missed their turn three times, they were kicked from the digging team and the rest of the players had to wait for a new fourth player to join them. Players could also leave the team voluntarily to try joining another team, but would have to wait five minutes before trying again as if they had successfully completed the task.
Every time the player dug, there was a one in three chance of uncovering an item. Mostly commonly, this would be a Pile of Grave Soil, which the player would leave behind so they didn't clutter up their Inventory. Any other items the player uncovered would be added to their inventory - this ranged from a Spooky Doughnut (the most common) to a Halloween Paint Brush (the most rare).
Bone testing
In order to test whether the dug up bones are those of the Spirit of Slumber, the user took some potion from Sophie, entered the graveyard, and found an open grave. The user could "Wait" at a grave being dug up until the coffin was exhumed to test it, as well as looking for a coffin already uncovered.
If the user was first to the coffin with the potion, they were asked to "Continue", and were then given the mass and volume of one of the bones. They were then asked to decide how many drops of potion, up to 250, were needed to test the bone correctly. The formula for working out the number of droplets needed was
that is, the density squared, times twenty-five. The result was to be rounded to its nearest whole number.
If the player used too many or too few drops of potion, Gilly would either get charred by an explosion or sick from the fumes.
After testing a bone, the user saw whether or not the bone was the Spirit's. If it wasn't, the user gained 150 NP and had to wait a while before being able to test a bone again. The user could return the potion to Sophie on the control panel after taking it if they were unable to, or did not wish to, test a bone. They would not be able to use the potion again for a five minutes.
The Spirit of Slumber's bones were the 129,700th tested, and were found by the player heavenest.
Process of elimination
After they identified the Spirit's grave, Bruno, Gilly, and Sophie discovered that the headstone was missing. In order to find out his name, players had to go through the Caretaker's records and cross off every name that was on another gravestone until only one was left.
If the player had kept a note of the graves they had visited in the previous step, they could cross off these names right away. Otherwise, they had to visit the 1,586 graveyards and check the names again. Sophie had taken the Caretaker's reference books, which were organised by date of death. The player had to look up the date of death from the gravestone, and then cross off the name they had seen.
Once a name was marked off, a red 'x' was painted on the gravestone. Working together, players managed to rule out all but one name by 28 October - the Spirit of Slumber's real name was Jubart Igig.
The Summoning Potion
In order to summon the Spirit, Sophie needed to make a potion for Bruno to drink. However, she wasn't sure of exactly which ingredients, or how much of them, she needed.
In this step, the player had to create three potions before Sophie got it right. Each experiment started with a cauldron full of red potion, and the player had to change it into a different colour. Each ingredient they could add could change some colours of potions into a different colour. For example, an ingredient might change a red potion to a blue potion, a green potion to a red potion, and have no effect on a blue potion. What each ingredient did to each colour potion was different for each player and each experiment.
| Ingredients | ||||
|---|---|---|---|---|

|

|

|

|

|
| Bumroot | Leafy Slorgblossom | Crushed Jurpleberries | Salt | Bronze Sansam |
In the first experiment, the player had the first three ingredients to use - Bumroot, Leafy Slorgblossom, and Crushed Jurpleberries. The player had to make a purple potion without adding more than four ingredients - adding too many ingredients would cause to potion to turn black and bubble over, and the user would have to start again. The purple potion wasn't right - it just made Bruno grow a lot of hair.
In the second experiment, the player had a new ingredient to work with - Salt - and had to make a four-colour swirl potion. They could add up to six things before the potion boiled over. The potion they began with was different to the first potion - this meant that the ingredients would have a slightly different effect. This potion ended up shrinking Bruno instead.
In the third experiment, the player had another new ingredient - Bronze Sansam. The player could add up to nine things in order to make a silver and red potion. This was the correct potion at last.
Chasing Mr. Krawley
After the Spirit of Slumber undid his spell, Bruno had to fight the Neovian townspeople, who had been restored to corporeal form but were still afflicted by Mr. Krawley's potion. Meanwhile, Gilly saw Mr. Krawley and chased after him towards Meepit Oaks. Players could take to the Battledome to fight against the monsters they encountered.
The monsters were released in four waves. First, players helped Gilly defeat animated gravestones starting on 2 November, then they fought against animated trees from 4 November. Players could help Bruno fight against the townspeople from 7 November, and the mysterious shadows from 8 November.
Unlike previous plots where players could carry on earning points for as many opponents as they could defeat, each opponent had a limit. After the player passed this limit, they could carry on fighting the opponent, but couldn't earn any more plot points from them.
| Enemy | Win limit | Difficulty | |
|---|---|---|---|
| 1st Wave | |||
| Ominous Stones | 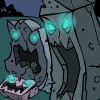 |
30 | 8 |
| Macabre Stones |  |
30 | 10 |
| Furious Stones | 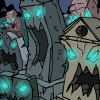 |
30 | 12 |
| 2nd Wave | |||
| Black Elm |  |
20 | 15 |
| Blathering Beech |  |
20 | 30 |
| Savage Sycamore | 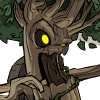 |
20 | 50 |
| Enemy | Win limit | Difficulty | |
|---|---|---|---|
| 3rd Wave | |||
| Herman Dorfdrap |  |
20 | 55 |
| Bennie the Jub |  |
20 | 100 |
| Disgruntled Townspeople |  |
20 | 200 |
| 4th Wave | |||
| Shrieking Shadow |  |
25 | 50 |
| Creeping Shadows |  |
20 | 75 |
| Malevolent Shadow |  |
15 | 150 |
The Curing Potion
In this step, players had to help Sophie create the antidote to Mr. Krawley's potion. Unlike creating the summoning potion, Sophie had to start from scratch.
Players had to produce five different potions by creating increasingly complicated composites. Composites were made from raw ingredients that had been prepared by burning, crushing, soaking, and/or desiccating. Composites had four magical properties - Conjuration, Divination, Enchantment, and Power. The four different preparations increased or decreased these properties, in different ways for different ingredients. An ingredient could be burnt for up to 30 seconds per gram, crushed for up to 60 seconds per gram, soaked for up to 90 seconds per gram, or desiccated for up to 120 seconds per gram. Any more than this wouldn't be able to change the magical property levels any further.
When the player produced a composite, it changed colour depending on which was its highest property. If it had two properties within ten points of each other, it showed a combination of those colours. The player could also see the exact numbers for each property each composite they made had.
Each of the ten ingredients are modified in a different way when the player performs a certain operation on them. The maximum amount each property can be modified is listed below. This information had to be worked out by players during the plot.
First potion
For the first potion, the player needed to produce 5 grams of a composite with one of the basic properties (chosen at random) between +50 and +70 (chosen at random), with a margin of ±5 points. They had the first three ingredients to work with, Bumroot, Leafy Slorgblossom, and Bagguss Pulp. This could be achieved by using one of the ingredients, but the player would have to use more than one operation on it.
Without Bruno to test the potion on, Sophie tested it on her Petpet Meowclops instead.
Sophie noted, "The smell of burning Meowclops hair is to be avoided at all costs."
Second potion
For the second potion, the player needed to produce two composites with two different values. The first composite had to be between 15 and 20 grams, with a magical property (chosen at random) between +40 and +45 ±5 points. The second composite had to have a value of between +80 and +90, ±5 points. The player needed exactly 25 grams of the second composite, but couldn't use more than 10 grams of any one ingredient in it - due to a bug, this requirement wasn't actually checked.
The player had a fourth ingredient to work with, Sharpgrass.
Sophie admonished her Meowclops for fighting with its Bearog head.
Third potion
For the third potion, players had two more ingredients to work with, Bloodfern Loam and Crushed Jurpleberries. They had to produce two composites, one of which had to have two properties (chosen at random) somewhere between 78 and 83 ±3. They needed 12 grams of this composite, containing no more than 3 grams of any one ingredient.
The other composite the player needed was a special composite called Spectral Essence. Sophie eventually remembered that it was made from Bloodfern Loam and Leafy Slorgblossom, but couldn't remember which property it needed. In fact, any composite that combined at least one gram each of Bloodfern Loam and Leafy Slorgblossom, with a Power property of at least +350 would become Spectral Essence.
'Dr. Meowsloth' complained, "You fool! You'll pay for this treachery! I, Dr. Sloth, will bring your ruin down upon you!"
Fourth potion
For this potion, the player could also work with Babaa Wool and Bronze Sansam. They had to create 12 grams of a composite with one property (chosen at random) between +65 and +75 ±2 and another property between +100 and +105 ±2. This composite couldn't contain more than 3 grams of any one ingredient.
The other two composites they had to produce were special composites. They had to produce another 10 grams of Spectral Essence, but had to prepare it so that it also had a Conjuration property of +275 ±1. The third composite was 10 grams of Anti-Gravitic Goo, and was made from Bagguss Pulp, Crushed Jurpleberries, and Babaa Wool. It required Conjuration and Diviniation properties of +200 or more, and no one ingredient could constitute more than 40% of the Goo by mass.
This cubist Meowclops couldn't even mew correctly - it said "Emw" instead.
Fifth potion
For the final potion, the player had access to Madvine Root and Nova Essence.
For this potion, the player needed to produce three composites again. They needed to produce 5 grams of a composite with two properties at +300 ±1, containing no more than 1 gram of each ingredient. They also had to produce another 10 grams of Anti-Gravitic Goo, with Enchantment at -406 ±1 and Power at +151 ±1. The final composite they had to produce was 10 grams of either Platinum Mist, Ice Plasma, or Psionic Singularity. Which one they needed was chosen at random.
Platinum Mist was made from twice as much Bronze Sansam as Sharpgrass, along with Madvine Root. All four magical properties needed to be +300 or more. Ice Plasma needed exactly one gram of Nova Essence mixed with Bumroot and Sharpgrass. Two of its properties had to have negative values, and the other two positive or 0 values. Psionic Singularity was made from four times as much Madvine Root as Nova Essence. To make it, any action had to be performed on either one (but not the other) of the ingredients for one second per gram. Sophie gave hints to help the player figure out what to combine for this composite.
This was Sophie's last try at making the cure. "If this one's not safe, then I don't know what I'll do..."
The Meepit Oaks Sanitorium for the Psychologically Fragile
In the next step, the player helped Gilly explore the abandoned asylum, The Meepit Oaks Sanitorium for the Psychologically Fragile. After Gilly got past the animated gravestones and possessed trees that the player had battled during an earlier step, she was chased inside the asylum by a crowd of zombies. The player found Meepit Oaks by clicking on the mist in between two buildings at the top centre of the Neovia map.
The asylum consisted of a maze of several rooms: an admissions lobby, a dining room, an outside courtyard, a supply room, and a cell block with five cells. The staff and patients are either dead or missing. Each pair of rooms was connected by identical looking hallways. In each hallway there were six doors - one led back to where the player had come from, one led forwards to the next room, and all the others led back to the same hallway. Which door did what was chosen at random for each player.
As they explore, the player and Gilly find journal pages scattered in different rooms that describe the last days of the sanitorium's head nurse, Lucy the Acara. She and two other asylum staff - Dr. Valus the Scorchio and the janitor Miles the Nimmo - had been left in charge of Meepit Oaks while the rest of the staff went back to their families in Neovia for Halloween. They must have become caught up in the Spirit of Slumber's spell, because they never returned, and when Dr. Valus visited Neovia the next day, the town was deserted.
Together, the three remaining employees struggled to look after all the patients until help arrived in the charismatic, golden-eyed Dr. Alexander from Neopia Central. He brought a special elixir that made the patients subdued and easier to care for - it is left to the players to make the connection between Dr. Alexander and his elixir and Mr. Krawley and his Hissi Oil. Dr. Alexander gave Lucy a magic, glowing flower that would never wilt, and needed no sunlight or water.
Dr. Alexander disappeared, and without the supply of the elixir, the patients became violent again. One of them escaped his restraints when Dr. Valus tried to feed him, and he let out the rest of the inmates. They attacked the remaining staff, and locked Lucy in one of the cells.
Gilly and the player arrive in Meepit Oaks' admissions lobby. There, they can find a page of Lucy's journal and two lamps bolted to the floor. The bolts on one of the lamps have rusted through enough the Gilly can pull it up when the player clicks on it, and it gets added to the Quest Inventory. The lobby had doors leading to the left and right. The left hand door led to the dining room, and the right hand door led to the courtyard.
The courtyard had four doors in it, one leading to the dining room, one to the lobby, one to the storage room, and one to the cell block (left to right). In the cell block, the player finds the way forward blocked by Miles' Petpet Zomutt. Lucy's journal provided a clue to how to placate the Zomutt - it seems it had buried a bone it had found in the courtyard. Returning there, the player could find where it was buried, but they needed a shovel to dig it up.
Gilly and the player could find one in the storage room, along with the skeleton of the late Dr. Valus. It seems like he might have been looking for a weapon to defend himself with, but ironically, he had asked Miles to put a lock on the tool closet "so that Dr. Kirkbride will stop stealing gardening supplies". Searching Dr. Valus' pockets, they discovered a journal page and a key, but not to the tool closet. The player needed to fetch the key from Miles before they could get a shovel.
Miles' corpse was in the dining room, surrounded by zombies. They would chase Gilly and the player away before they could reach Miles or the journal page. The player had to use the lamp from the lobby as an improvised weapon to shoo them off. The key was in Miles' breast pocket. The player could now unlock the closet and retrieve a shovel, and then use this to dig up the Zomutt's bone.
This would occupy the Zomutt enough so that the player could enter the cell block. All the cell doors were rusty and locked. Dr. Valus' key would open only one, where the final journal page was: Lucy's cell.
Mayor Thumburt
After Gilly and Sophie were reunited, Sophie combined the flower with her golden potion to produce the cure. They planned to put it into the town's water supply, but first they had to get past Mayor Thumburt. Players were challenged by him when they visited Neovia, and helped out by attack him in the Battledome. His challenge made his motivations clear:
"He was elected to be mayor of the town, but who ever really wants to be just mayor?"
Mayor Thumburt was too strong for any player to defeat individually, but their combined effort slowly weakened him. Players earned plot points for losing to him up to 30 times. As the fight wore on, the Hissi Oil's effects on the Mayor became more pronounced and he became more and more monstrous. Each of his three forms carried different Battledome equipment.
|
|
|
Prizes
| Task Trophies | ||
|---|---|---|
| Trophy | Criteria | Ranks |

|
Individual Digs | Spoon Scraper 1 - 77 - ? Shovel Flailer ? - 89 - 370 - ? Digmaster ? - 425 - 1805 - ? |

|
Completed Graves | Grave Digger 1 - 4 Bone Thief 5 - 21 - ? Mortician ? - 25 - 110 - ? |

|
Bone Testing | Potion Spiller 1 - 2 Bone Exploder 3 - 10 - ? Scientist ? - 12 - 15 - ? |

|
Potion Fetching | Gopher 1 - 2 Stuffbringer 3 - 10 - ? Spirit of Carrying Things ? - 12 - 47 - ? |

|
Name Elimination | I Can Read™ 1 - 3 Bookworm 4 - 25 - ? Head Librarian ? - 32 - 204 - ? |
On the January 4, 2007, The Neopets Team released the user statistics page which marked each step of the plot the user had completed. Additionally, the statistics for the user's fights in the Battledome opponents were included along with minor trophies and ranks associated with other tasks during the plot. At the same time, the official plot solution was released.
| Trophies | ||||||
|---|---|---|---|---|---|---|

|

|

|

|

|

|

|
| Swamp Slorg | Asylum Inmate | Vine Weaver | Meepit Wrangler | Neovian Citizen | Master Chemist | Honorary Mayor of Neovia |
Overall plot points were not given until March 2, 2007, when a new trophy for a User Lookup was given showing the total number of points given based on the overall participation in the plot. Visiting Sophie's Shack awarded the user with the Tale of Woe sidebar theme and the Tale of Woe - Krawley avatar, providing the user had participated in the plot.
Additionally, Sophie now offered a selection of 32 prizes for users to 'purchase' with their plot points. 'Spending' the points did not result in the player losing the points that had earned them their rank. Most of the plot prizes were references to the activities of or user responses to the plot.
The prizes to choose from were:
|
|
|
Behind the scenes
- This plot was released in conjunction with the Haunted Woods expansion for the Neopets TCG.
- Although the only repercussion for disturbing the graves the plot characters faced was losing the co-operation of the Caretaker, after the Spirit of Slumber's bones had been found, players exploring the Haunted Woods began to experience visitations from angry Ghost Neopets, like this:
| Something has haunted! | |
|---|---|
 |
BOO! Uh oh! It looks like all that digging up of graves has disturbed some of the more... eerie denizens of the Haunted Woods. A peace offering would be nice... or perhaps you should just RUN!! |
- The apparitions did not actually harm the player.
Bugs

- When the third plot step was released - where the player had to find Ilere - on 13 October, players experienced glitches including the Ghost Meepits appearing in the Quest Inventory at random. To resolve the bugs, The Neopets Team had to move a database. While the database move was occurring, plot-related pages were replaced with the following messages:
TEMPORARY DB MOVE - WILL BE BACK SHORTLY
MORE DATABASE ISSUES -- GEEZ THERE'S A LOT OF YOU GUYS -- DON'T HOLD YOUR BREATH
- The first wave of Battledome opponents - the animated gravestones - were added to the 1-player challenger list a day early, on 1 November, before the non-war challengers were removed.
- Players experienced considerable lag in the Battledome during the first two waves of enemies due to the sheer number of players battling at once.
- One of the rules set for the second composite step, that one of the composites couldn't have more than 10 grams of any single ingredient, was not enforced due to a programming bug.
Cameos and references
- One of the gypsy camp members is an Aisha called Megan, who would go on to feature in Neopets: Petpet Adventures - The Wand of Wishing.
- The player encounters a Two-Headed Hissi while looking for Ilere. One of its head always lies and one always tells the truth. This is a reference to the Knights and Knaves puzzle, although it plays out differently here.
- Ilere's doorway is inscribed with a message in runes, "dance friend and enter". This is a reference to the Doors of Durin in Tolkien's Lord of the Rings, whose inscription reads, "speak friend and enter".
- Sophie doesn't want to ask for the Brain Tree and Esophagor's help due to a "bad experience" she had with them. To solve the Brain Tree's quests, players must complete two of the Esophagor's quests. These often cost the player more than the reward is worth.
- The Caretaker revisits the angry Yurble stock character from the Lost Desert Plot and the Altador Plot, the Foreman.
- After discovering The Spirit of Slumber's real name, Jubart Igig, Gilly wonders aloud, "Doesn't sound like most of the other names we found. Maybe it's an anagram of something... Nah." - this is an inside joke to the game The Castle of Eliv Thade where the player has to unscramble anagrams, starring Gilly.
- The evil shadows Bruno and the player fight in this plot resemble the Wraiths the player encountered in The Faeries' Ruin.
- One of Sophie's potions makes her Meowclops act like Dr. Sloth.
- After the plot, a Wocky Gypsy claimed there was never any Pink Elephante in the camp. This may be a reference to "seeing pink elephants", a euphemism for alcoholic hallucination, as in the 1941 movie Dumbo.
- The plot appears to be based off the book and film Something Wicked This Way Comes.
External links
- Plot Info: The Tale of Woe (comic), Tale of Woe Solution, Tale of Woe Score
- Plot locations: The Gypsy Camp, Neovia, Sophie's Shack, Burned-down House (dead link), Bruno's Cave (dead link), Haunted Woods Maze (dead link), Caretaker's Vault (dead link), Graveyard (dead link), Sophie's Lab (dead link), Meepit Oaks (dead link), Quest Inventory (dead link)
- Editorial: 262, 263, 264, 265, #270, #281, #301, #371, #447, #463, #468, #575, #553, #602, #603, #636


