Difference between revisions of "The Faeries' Ruin"
(→Build a wand: images) |
(→Story) |
||
| (11 intermediate revisions by one other user not shown) | |||
| Line 1: | Line 1: | ||
[[Image: | [[Image:Tfr faerie festival.png|thumb|550px|right|A curse turned all the Faeries to stone.]] | ||
'''The Faeries' Ruin''' was a [[plot]] that started on 20 September, 2010 and concluded on 24 December. Puzzles remained open for completion until midnight on 1 January, 2011, and an epilogue and prize shop was released on | '''The Faeries' Ruin''' was a [[plot]] that started on 20 September, 2010 and concluded on 24 December. Puzzles remained open for completion until midnight on 1 January, 2011, and an epilogue and prize shop was released on 26 January[[#Notes|†]]. It documented the journey of a band of heroes through [[Neopia]] as they tried to undo a curse on the Faeries and rescue [[Faerieland]]. | ||
The plot opened with the interruption of the [[Faerie Festival]] as nearly all of the [[faerie]]s in the world mysteriously turned to stone<!-- except bottled ones, see "Balthazar discovers the Faeries Ruin" Neopedia article -->. Without the faeries' magic, [[Faerieland]] began sinking towards the ground, and shadowy monsters began to emerge. During the course of the plot, nearly all activities that involved faeries — from the games and shops on Faerieland to the [[Neggery]] and the [[Cooking Pot]] — were suspended due to the faeries' condition. | The plot opened with the interruption of the [[Faerie Festival]] as nearly all of the [[faerie]]s in the world mysteriously turned to stone<!-- except bottled ones, see "Balthazar discovers the Faeries Ruin" Neopedia article -->. Without the faeries' magic, [[Faerieland]] began sinking towards the ground, and shadowy monsters began to emerge. During the course of the plot, nearly all activities that involved faeries — from the games and shops on Faerieland to the [[Neggery]] and the [[Cooking Pot]] — were suspended due to the faeries' condition. | ||
The plot starred several new characters, including [[Brynn]], a female [[Kougra]] knight, [[Hanso]], an [[Ixi]] thief, and [[Xandra]], a [[Xweetok]] sorceress. It also | The plot starred several new characters, including [[Brynn]], a female [[Kougra]] knight, [[Hanso]], an [[Ixi]] thief, and [[Xandra]], a [[Xweetok]] sorceress. It also revisited several characters who have appeared in previous plots, including [[Jazan]] of [[Lost Desert Plot]] fame and [[King Altador]]. | ||
Players participated in The Faeries' Ruin through individual puzzles, cooperative puzzles, and the [[Battledome]] in roughly equal amounts. It also introduced [[wikipedia:Achievement (video gaming)|achievements]], termed "Fearless Deeds", which were awarded for certain miscellaneous accomplishments in each plot step. | Players participated in The Faeries' Ruin through individual puzzles, cooperative puzzles, and the [[Battledome]] in roughly equal amounts. It also introduced [[wikipedia:Achievement (video gaming)|achievements]], termed "Fearless Deeds", which were awarded for certain miscellaneous accomplishments in each plot step. | ||
Like [[The Cyodrake's Gaze]] plot, parts of the story had [[wikipedia:unreliable narrator|unreliable narrator]]s. | Like [[The Cyodrake's Gaze]] plot, parts of the story had [[wikipedia:unreliable narrator|unreliable narrator]]s. Beginning on 10 November 2014, the plot comics were [http://www.madefire.com/motion-books/Neopets-faeries-ruin-episode-1 re-released] on the Madefire platform, a [[Wikipedia:motion comics|motion comics]] [[wikipedia:app|app]]. | ||
The Faerie Festival would be disrupted by [[Wraith]]s again in [[Faerie Festival 2017|2017]] due to [[The Wraith Resurgence]]. | |||
==Synopsis== | ==Synopsis== | ||
During the Faerie Festival, all the Faeries were turned to stone by a mysterious artefact. A band of a heroes came from across [[Neopia]] in order to find the culprit responsible and devise an antidote - but then the shadows came alive and began to attack. After retrieving a spell book and a second artefact, one of the heroes - [[Xandra]] - began a complicated ritual to restore the Faeries. | During the Faerie Festival, all the Faeries were turned to stone by a mysterious artefact. A band of a heroes came from across [[Neopia]] in order to find the culprit responsible and devise an antidote - but then the shadows came alive and began to attack. After retrieving a spell book and a second artefact, one of the heroes - [[Xandra]] - began a complicated ritual to restore the Faeries. | ||
However, Xandra betrayed them: Faerieland crashed east of the [[Haunted Woods]] and she turned most of the heroes to stone. Xandra, it was revealed, was the villain | However, Xandra betrayed them: Faerieland crashed east of the [[Haunted Woods]] and she turned most of the heroes to stone. Xandra, it was revealed, was the villain all along: she saw them as tyrants who kept their magical power to themselves instead of using it to help the rest of the planet, and turned them to stone to begin with. | ||
[[Hanso]] - one of the heroes who escaped the second petrification spell - stole the first artefact and used it to absorb some of Xandra's spells. He smashed it, the magic was released, and he and Xandra were turned to stone as well. This broke the curse holding the Faeries, and [[Fyora]] was able to restore Hanso to life. The heroes returned to their nations, and the Faeries started work rebuilding their city in its new home. | [[Hanso]] - one of the heroes who escaped the second petrification spell - stole the first artefact and used it to absorb some of Xandra's spells. He smashed it, the magic was released, and he and Xandra were turned to stone as well. This broke the curse holding the Faeries, and [[Fyora]] was able to restore Hanso to life. The heroes returned to their nations, and the Faeries started work rebuilding their city in its new home. | ||
==Story== | ==Story== | ||
[[Image:Tfr_chapter_2_2.png|thumb|left|300px|"It's a pretty good story, actually..."]] | |||
At the Faerie Festival, all the Faeries had been turned to stone, and [[Hanso]] the [[Ixi]] was looking for things to steal. | |||
[[Image:Tfr_chapter_2_2.png| | |||
At the Faerie Festival, | |||
He was not the Festival's only visitor. Several [[Neopia]]n lands had sent representatives to investigate the crisis: from [[Altador]], [[King Altador]] and his guards, from [[Brightvale]], the knight [[Brynn]], and from [[Qasala]], King [[Jazan]]. | |||
Hanso explained that as he was on the way to the festival - "You mean you were going to steal from the faeries at their festival." - he saw [[Hubrid Nox]], who was holding a shiny artefact and chanting an incantation. After a blinding flash of light, Nox had vanished and all the faeries | Hanso tried to sell them information. Brynn and Hanso recognised each over from the time he had spent in Brightvale's dungeons, and neither she nor King Jazan were keen to trust him. He was, however, their own lead, so they agreed to hear him out. | ||
[[Image:nox.png|right|thumb|300px|Nox uses the stolen artefact.]] | |||
Hanso explained that as he was on the way to the festival - "You mean you were going to steal from the faeries at their festival." - he saw [[Hubrid Nox]], who was holding a shiny artefact and chanting an incantation. After a blinding flash of light, Nox had vanished and all the faeries had become stone. Although Jazan and Altador doubted Hubrid Nox would be powerful enough to curse all the faeries, Brynn vouched that he would have no reason to lie, and that the artefact Hanso claimed to have seen may have something to do with it. | |||
The group headed in to Faerie City to see [[Xandra]], a [[Xweetok]] who too was investigating the curse. On seeing Hanso, however, she became enraged - he had stolen several valuable artefacts from her hut earlier. | The group headed in to Faerie City to see [[Xandra]], a [[Xweetok]] who too was investigating the curse. On seeing Hanso, however, she became enraged - he had stolen several valuable artefacts from her hut earlier. | ||
[[ | [[File:Flashb.png|thumb|300px|left|Hanso looted Xandra's library.]] | ||
Hanso confessed that while he didn't lie about seeing Hubrid Nox, it wasn't the whole truth - he had broken into Xandra's hut, too. | Hanso confessed that while he didn't lie about seeing Hubrid Nox, it wasn't the whole truth - he had broken into Xandra's hut, too. | ||
Hanso explained that after he had stolen from Xandra, he put the word out that he had four magical artefacts to fence. He was contacted by a buyer who wanted to meet in Faerieland - Hubrid Nox. Nox was only interested in one of the artefacts, and Hanso tailed him to see what he would do with it: as Hanso had already explained, he chanted, there was a flash of light, and all the faeries turned to stone. Xandra still didn't trust Hanso's word, but Brynn and Altador were convinced, and went to recover the artefact from Nox before he could do any more damage with it. | Hanso explained that after he had stolen from Xandra, he put the word out that he had four magical artefacts to fence. He was contacted by a buyer who wanted to meet in Faerieland - Hubrid Nox. Nox was only interested in one of the artefacts, and Hanso tailed him to see what he would do with it: as Hanso had already explained, he chanted, there was a flash of light, and all the faeries turned to stone. Xandra still didn't trust Hanso's word, but Brynn and Altador were convinced, and went to recover the artefact from Nox before he could do any more damage with it. | ||
The group - Hanso under guard - arrived at [[Castle Nox]] in the [[Haunted Woods]]. As they formed their plan to storm the stronghold, Hanso slipped away. Brynn went after him - as Nox could appear any second, they couldn't afford to delay their plan. | The group - Hanso under guard - arrived at [[Castle Nox]] in the [[Haunted Woods]]. As they formed their plan to storm the stronghold, Hanso slipped away. Brynn went after him - as Nox could appear any second, they couldn't afford to delay their plan. | ||
Brynn found Hanso climbing over the wall away from the front gates - he said that he would find his own way in. | Brynn found Hanso climbing over the wall away from the front gates - he said that he would find his own way in. | ||
{| style="margin:0 auto;" | |||
| | |||
{{cq|And how do I know you're not going in there to tip [[Hubrid Nox|him]] off?}} | {{cq|And how do I know you're not going in there to tip [[Hubrid Nox|him]] off?}} | ||
{{cq|Well, if you don't trust me, you could always stop me.}} | {{cq|Well, if you don't trust me, you could always stop me.}} | ||
|} | |||
[[Image:Tfr_chapter_5.png|right|thumb|300px|Nox has a close encounter with a familiar face.]] | |||
As soon as Hanso snuck in through one of the castle windows, he was spotted by Nox. Hanso asked Nox about the artefact - but Nox didn't seem to know what he was talking about. At that moment, an alarm went off, and Nox saw through his crystal ball Altador and the others storming the gates. Nox opened a secret passageway, threw the crystal ball at Hanso, and made good his escape. | As soon as Hanso snuck in through one of the castle windows, he was spotted by Nox. Hanso asked Nox about the artefact - but Nox didn't seem to know what he was talking about. At that moment, an alarm went off, and Nox saw through his crystal ball Altador and the others storming the gates. Nox opened a secret passageway, threw the crystal ball at Hanso, and made good his escape. | ||
| Line 53: | Line 53: | ||
Meanwhile, out in the Haunted Woods, Hubrid Nox ran away from his castle, gloating over his escape - before running straight into another Hubrid Nox, who blasted him to the ground. | Meanwhile, out in the Haunted Woods, Hubrid Nox ran away from his castle, gloating over his escape - before running straight into another Hubrid Nox, who blasted him to the ground. | ||
After Brynn and Hanso used the control panel to help the rest of the heroes escape, Jazan accused Hanso of letting Nox escape and blamed him for getting trapped in the castle. Although Hanso protested that he helped them get out of the castle, they overruled him, and decided to proceed without him. They argued over where Nox could have gone, when [[Faerieland]], surrounded by sinister purple clouds and crackling lightning, appeared overhead. Altador suggested that the faerie's condition had adversely affected the city, when the group was attacked from all sides by shadowy monsters. | After Brynn and Hanso used the control panel to help the rest of the heroes escape, Jazan accused Hanso of letting Nox escape and blamed him for getting trapped in the castle. Although Hanso protested that he helped them get out of the castle, they overruled him, and decided to proceed without him. They argued over where Nox could have gone, when [[Faerieland]], surrounded by sinister purple clouds and crackling lightning, appeared overhead. Altador suggested that the faerie's condition had adversely affected the city, when the group was attacked from all sides by shadowy monsters. | ||
[[Image: | [[Image:shadows.png|left|thumb|300px|A new threat emerges from the shadows.]] | ||
Jazan reasoned that the monsters they were fighting could not belong to Nox, as his minions are ghosts. Hanso and Altador realised that the wraiths were distracting them from the sinking Faerieland, and between waves, they resolved to split up. Brynn would go to [[The Finneus J. Scrollbottom Auxiliary Surplus Archives|Brightvale's library]] to see if there was anything they could use, and take Hanso to the dungeons there. Xandra said she should research more on faerie artefacts as well. The rest of the team would remain to see if the wraiths led them to Nox. | |||
Brynn and Hanso reminisced as to the first time they met, and after a while Xandra excused herself to go to her own books. When they reached Brightvale, they noticed the colour seemed to have gone from it. Brynn dutifully locked Hanso up, but promised she would return after going to the library. | Brynn and Hanso reminisced as to the first time they met, and after a while Xandra excused herself to go to her own books. When they reached Brightvale, they noticed the colour seemed to have gone from it. Brynn dutifully locked Hanso up, but promised she would return after going to the library. | ||
| Line 71: | Line 69: | ||
Brynn met Xandra in the cave, who said she had also been captured. The other people in the cave seemed ill: Xandra thought the Spectres were feeding off them somehow. She wanted to know if Brynn had found a solution, and suggested the writing in the book may have been a puzzle of some kind. With the help of Hanso, who had snuck into the cave by piggy-backing on one of the Spectres, the trio managed to escape. | Brynn met Xandra in the cave, who said she had also been captured. The other people in the cave seemed ill: Xandra thought the Spectres were feeding off them somehow. She wanted to know if Brynn had found a solution, and suggested the writing in the book may have been a puzzle of some kind. With the help of Hanso, who had snuck into the cave by piggy-backing on one of the Spectres, the trio managed to escape. | ||
[[Image:arte2.png|right|thumb|300px|The group finds the second artefact.]] | |||
On examining the book, Xandra stated that it did not contain a counter-spell, but a map to some ruins. Hanso recognized them - they were one of the safe houses when he was a member of the [[Thieves' Guild]]. As it was their only lead, the trio travelled to the ruins, hoping to find something they could use. Within the ruins, they ran into more ghouls and split up. Xandra and Hanso found another artefact that looked like it was connected to the one used against the Faeries. | |||
Hanso was wary of traps and [[Wikipedia:Raiders of the Lost Ark|asked Xandra if she had a bag of sand]], but she rolled her eyes and just grabbed the artefact, which didn't seem to be booby trapped after all. They met up with Brynn again and decided to head back to the Haunted Woods, hoping the second artefact could undo the spell the first one cast. | Hanso was wary of traps and [[Wikipedia:Raiders of the Lost Ark|asked Xandra if she had a bag of sand]], but she rolled her eyes and just grabbed the artefact, which didn't seem to be booby trapped after all. They met up with Brynn again and decided to head back to the Haunted Woods, hoping the second artefact could undo the spell the first one cast. | ||
| Line 79: | Line 77: | ||
{{cq|It's worse than just Faerieland sinking. King Altador, I think all of Neopia is in terrible danger...}} | {{cq|It's worse than just Faerieland sinking. King Altador, I think all of Neopia is in terrible danger...}} | ||
Brynn explained that it seemed all of Neopia seemed drained, and everything was decaying or dying. Jazan wondered if the Faeries were more involved in the well-being of the planet than they had realised. With time running out, they needed to reverse the spell as soon as they could, and Xandra resolved to try. They moved out in to the open, and Brynn and Hanso held the artefact up for Xandra while the heroes defended them against the renewed forces of the wraiths. | Brynn explained that it seemed all of Neopia seemed drained, and everything was decaying or dying. Jazan wondered if the Faeries were more involved in the well-being of the planet than they had realised. With time running out, they needed to reverse the spell as soon as they could, and Xandra resolved to try. They moved out in to the open, and Brynn and Hanso held the artefact up for Xandra while the heroes defended them against the renewed forces of the wraiths. | ||
[[Image:Tfr_crash.jpg|left|thumb|400px|Xandra had no intention of ever saving Faerieland.]] | |||
As the ritual was completed, there was a shockwave from the artefact. Hanso picked himself up, and saw Brynn lying on the ground, while outside of Xandra's magical barrier, the heroes had been turned to stone. The Phantoms closed in on Xandra, who scoured them away with green flames. Hanso stared in shock as the Xweetok stood with an evil glint in her eye and Faerieland crashed behind them in a shower of fireballs. It was at this point that Hasno and Brynn had learned the horrible truth: Xandra ''wanted'' Faerieland to fall... | As the ritual was completed, there was a shockwave from the artefact. Hanso picked himself up, and saw Brynn lying on the ground, while outside of Xandra's magical barrier, the heroes had been turned to stone. The Phantoms closed in on Xandra, who scoured them away with green flames. Hanso stared in shock as the Xweetok stood with an evil glint in her eye and Faerieland crashed behind them in a shower of fireballs. It was at this point that Hasno and Brynn had learned the horrible truth: Xandra ''wanted'' Faerieland to fall... | ||
{{cq|It was a symbol, Brynn. That's all. Symbols have power, and getting rid of that symbol is something that Neopia has needed for a long, long time...}} | {{cq|It was a symbol, Brynn. That's all. Symbols have power, and getting rid of that symbol is something that Neopia has needed for a long, long time...}} | ||
| Line 91: | Line 89: | ||
Hanso remembered the 'Nox' he saw cast the spell called Faeries "winged tyrants" - and realised 'Nox' must have been Xandra in disguise. Xandra said the world would be better off under a Neopet ruler: her. The artefact Hanso had stolen and the sibling they found in the ruin had both served to amplify her magic so she could overwhelm the Faeries. The shadowy wraiths, spectres, and phantoms, who had been plaguing Brightvale and the Haunted Woods, were a side-effect from the petrification spell unintended by Xandra. | Hanso remembered the 'Nox' he saw cast the spell called Faeries "winged tyrants" - and realised 'Nox' must have been Xandra in disguise. Xandra said the world would be better off under a Neopet ruler: her. The artefact Hanso had stolen and the sibling they found in the ruin had both served to amplify her magic so she could overwhelm the Faeries. The shadowy wraiths, spectres, and phantoms, who had been plaguing Brightvale and the Haunted Woods, were a side-effect from the petrification spell unintended by Xandra. | ||
Xandra hoped to rebuild Neopia with Neopets and their own strengths, not through the blessings of the faeries. Seeing their potential, she offered Brynn and Hanso a chance to join her: Brynn refused at once, but Hanso listened. Xandra said that if Hanso helped her rebuild, he would be remembered as a hero, not a thief. Recalling the distrust from his fellow heroes - including Brynn - and despite Brynn begging for his help, Hanso instead seemed to agree to Xandra's offer. | Xandra hoped to rebuild Neopia with Neopets and their own strengths, not through the blessings of the faeries. Seeing their potential, she offered Brynn and Hanso a chance to join her: Brynn refused at once, but Hanso listened. Xandra said that if Hanso helped her rebuild, he would be remembered as a hero, not a thief. Recalling the distrust from his fellow heroes - including Brynn - and despite Brynn begging for his help, Hanso instead seemed to agree to Xandra's offer. | ||
[[Image:chase.png|right|thumb|Hanso steals the | [[Image:chase.png|right|thumb|300px|Hanso steals one of the artefacts.]] | ||
However, it was a ruse! Hanso snatched the smaller artefact from Xandra and threw it to Brynn, telling her to destroy it. Brynn hesitated in the confusion, which gave the Xweetok witch enough time to summon it back. Hanso grabbed the artefact from the air as he and Brynn fled. | However, it was a ruse! Hanso snatched the smaller artefact from Xandra and threw it to Brynn, telling her to destroy it. Brynn hesitated in the confusion, which gave the Xweetok witch enough time to summon it back. Hanso grabbed the artefact from the air as he and Brynn fled. | ||
Enraged, Xandra summoned a giant Wraith called Oblivion to kill Brynn while she dealt with Hanso. The Ixi absorbed her attacks into the artefact while goading her with insults, and when it was full of energy, he shattered it with his dagger. There was a burst of green light, and the clouds parted. Brynn defeated Oblivion, and rushed over to Hanso - but both Hanso and Xandra had been turned to stone. | Enraged, Xandra summoned a giant Wraith called Oblivion to kill Brynn while she dealt with Hanso. The Ixi absorbed her attacks into the artefact while goading her with insults, and when it was full of energy, he shattered it with his dagger. There was a burst of green light, and the clouds parted. Brynn defeated Oblivion, and rushed over to Hanso - but both Hanso and Xandra had been turned to stone. | ||
[[Image:price2.png|left|thumb|300px|Hanso's plan comes at a price.]] | |||
Not long after, King Altador and his guardsmen, King Jazan, the Ogrin Master, and even Queen Fyora arrived as the dust settled; all free from Xandra's petrification spell. The Faerie Queen freed Hanso from the effects of the broken mirror. After everyone congratulated the thief for his heroism, Fyora explained that Xandra had underestimated the Faeries' involvement in Neopia, as their magic was needed to protect the world from the wraiths. She then disappeared with the petrified Xweetok, asking Hanso to meet up with her later. | Not long after, King Altador and his guardsmen, King Jazan, the Ogrin Master, and even Queen Fyora arrived as the dust settled; all free from Xandra's petrification spell. The Faerie Queen freed Hanso from the effects of the broken mirror. After everyone congratulated the thief for his heroism, Fyora explained that Xandra had underestimated the Faeries' involvement in Neopia, as their magic was needed to protect the world from the wraiths. She then disappeared with the petrified Xweetok, asking Hanso to meet up with her later. | ||
Hanso revealed to his allies that beforehand, he saw something in the book from Brightvale that helped him break the spell, freeing everyone from their stone predicament. He then confessed that he was lucky that Fyora freed him. The group began to go their separate ways: Altador and his men returned to [[Altador|their own kingdom]] to see if there was any damage done from the days past, while Jazan and Hanso discuss buying some of the jewellery Hanso had stolen for [[Nabile]] as a gift. | Hanso revealed to his allies that beforehand, he saw something in the book from Brightvale that helped him break the spell, freeing everyone from their stone predicament. He then confessed that he was lucky that Fyora freed him. The group began to go their separate ways: Altador and his men returned to [[Altador|their own kingdom]] to see if there was any damage done from the days past, while Jazan and Hanso discuss buying some of the jewellery Hanso had stolen for [[Nabile]] as a gift. | ||
===Epilogue=== | ===Epilogue=== | ||
Hanso told a young [[Wocky]] named Timmy about the events that followed Xandra's downfall. | Hanso told a young [[Wocky]] named Timmy about the events that followed Xandra's downfall. | ||
| Line 283: | Line 280: | ||
===The Finneus J. Scrollbottom Auxiliary Surplus Archives=== | ===The Finneus J. Scrollbottom Auxiliary Surplus Archives=== | ||
Refreshing at the map of [[Brightvale]] eventually causes a text link to appear beneath it, reading "You notice a strange door on one side of the castle... how odd." - some people have reported having to turn [http://addons.mozilla.org/en-US/firefox/addon/1865/ Adblock] or [http://noscript.net/ NoScript] off in their browsers before it would appear. The link leads to [ | Refreshing at the map of [[Brightvale]] eventually causes a text link to appear beneath it, reading "You notice a strange door on one side of the castle... how odd." - some people have reported having to turn [http://addons.mozilla.org/en-US/firefox/addon/1865/ Adblock] or [http://noscript.net/ NoScript] off in their browsers before it would appear. The link leads to [[The Finneus J. Scrollbottom Auxiliary Surplus Archives|the Brightvale archives]], where a relative of the grumpy [[Yurble]] [[The Foreman|foreman]] is trying to get the library organised for Brynn. Mistaking the player for a library intern he requested, he orders them to get to work sorting out one of the archive's many rooms. | ||
The user must access the archives by clicking on the link beneath the Brightvale map first before they will be able to use the direct link above to get there. After it has been accessed, the link will appear above the Brightvale map, reading "Visit the Finneus J. Scrollbottom Auxiliary Surplus Archives". | The user must access the archives by clicking on the link beneath the Brightvale map first before they will be able to use the direct link above to get there. After it has been accessed, the link will appear above the Brightvale map, reading "Visit the Finneus J. Scrollbottom Auxiliary Surplus Archives". | ||
| Line 1,208: | Line 1,205: | ||
*'''Xandra''' - ''Xandra, having revealed her true nature, tries to entice Hanso into joining her in ruling Neopia. Will he give in, or try to free Neopia from Xandra's control? Meanwhile, Brynn faces an old foe once again...'' | *'''Xandra''' - ''Xandra, having revealed her true nature, tries to entice Hanso into joining her in ruling Neopia. Will he give in, or try to free Neopia from Xandra's control? Meanwhile, Brynn faces an old foe once again...'' | ||
:Complete the puzzle. | :Complete the puzzle. | ||
*'''[[wikipedia:Triumph, the Insult Comic Dog|Triumph]]''' - ''[[Wikipedia: | *'''[[wikipedia:Triumph, the Insult Comic Dog|Triumph]]''' - ''[[Wikipedia:The Secret of Monkey Island|How appropriate. You fight like a kau.]]'' | ||
*:Use all the different insults at least once. It doesn't matter how many puzzles the player needs to play use all the insults, and insult used in failed puzzles count. | *:Use all the different insults at least once. It doesn't matter how many puzzles the player needs to play use all the insults, and insult used in failed puzzles count. | ||
*'''[http://knowyourmeme.com/memes/its-over-9000 Over 9000]''' - ''What, are you in a hurry? Because clearly we're not. '' | *'''[http://knowyourmeme.com/memes/its-over-9000 Over 9000]''' - ''What, are you in a hurry? Because clearly we're not. '' | ||
| Line 1,316: | Line 1,313: | ||
|} | |} | ||
==Neocash | ==Neocash activity== | ||
The Faeries' Ruin is the second plot to include an additional [[Neocash]] element, after the previous year's [[Atlas of the Ancients]]. As in the previous plot, [[The Neopets Team]] reported that "it in no way affects your plot score." | The Faeries' Ruin is the second plot to include an additional [[Neocash]] element, after the previous year's [[Atlas of the Ancients]]. As in the previous plot, [[The Neopets Team]] reported that "it in no way affects your plot score." | ||
| Line 1,324: | Line 1,321: | ||
Once the lever on the Transfabulator is pulled, the key used to enter the Corridor is used up. | Once the lever on the Transfabulator is pulled, the key used to enter the Corridor is used up. | ||
== | ==Behind the scenes== | ||
*After the release of the first chapter, a [[wikipedia:meme|meme]] began on the [[Neoboards]] as to the fate of a pie, which had also been petrified along with the faeries. This was referenced in [[Lenny Conundrum]] [http://www.neopets.com/games/conundrum_feature.phtml?round=375 round 375], [[Random Contest]] [http://www.neopets.com/random_contest.phtml?place=201 number 201], and the [[Neopian Times]] [http://www.neopets.com/ntimes/index.phtml?section=editorial&week=462 Editorial number 462]. Ultimately, a stone pie was released as a plot prize. | *After the release of the first chapter, a [[wikipedia:meme|meme]] began on the [[Neoboards]] as to the fate of a pie, which had also been petrified along with the faeries. This was referenced in [[Lenny Conundrum]] [http://www.neopets.com/games/conundrum_feature.phtml?round=375 round 375], [[Random Contest]] [http://www.neopets.com/random_contest.phtml?place=201 number 201], and the [[Neopian Times]] [http://www.neopets.com/ntimes/index.phtml?section=editorial&week=462 Editorial number 462]. Ultimately, a stone pie was released as a plot prize. | ||
*The Faeries' Ruin plot was chosen as the Best Plot in the [[Neopies|3rd Annual Neopies]] - although it was the only nominee in that category. | *The Faeries' Ruin plot was chosen as the Best Plot in the [[Neopies|3rd Annual Neopies]] - although it was the only nominee in that category. | ||
| Line 1,330: | Line 1,327: | ||
=== Site changes during the fall === | === Site changes during the fall === | ||
* | Several site elements were altered during this plot: | ||
*The shops both at the [[Healing Springs]] and the [[Hidden Tower]] remained open without their owners present, presumably relying on an honesty-box system, even after Faerieland crashed. | *Although the Faeries were petrified, the [[Healing Springs]] had some "residual magic" to be used at the user's own risk. Before the release of ''Into the Fray'', if the user tried to "Heal my Pets", they were told there was no-one there to heal them; during and after ''Into the Fray'', it generated one of the Water Faerie's item events - either a low level snowball or a healing potion. | ||
*The shops both at the [[Healing Springs]] and the [[Hidden Tower]] remained open without their owners present, presumably relying on an honesty-box system, even after Faerieland crashed. New items were released as normal: the Maractite Paint Brush began to be sold at the Hidden Tower on the same day that Faerieland crashed. | |||
*The [[Soup Kitchen]] was still usable during the plot, as the [[Soup Faerie]] had made an extra large cauldron of soup. | *The [[Soup Kitchen]] was still usable during the plot, as the [[Soup Faerie]] had made an extra large cauldron of soup. | ||
*Beginning around 10 November, the height recorded on Faerieland's main page dropped from 10,000 feet to 9,000 feet in line with the events of the plot. It had dropped another 1,000 feet by the 15 November, and another by 18 November. It was down to only 3,000 by the 23 November - Oblivion's release date. Later on that day, it was down to 2,000 feet, and by the 24th it was at 1,000. | *Beginning around 10 November, the height recorded on Faerieland's main page dropped from 10,000 feet to 9,000 feet in line with the events of the plot. It had dropped another 1,000 feet by the 15 November, and another by 18 November. It was down to only 3,000 by the 23 November - Oblivion's release date. Later on that day, it was down to 2,000 feet, and by the 24th it was at 1,000. | ||
*By the end of 24 November, the description on Faerieland's main page was gone, replaced by a link to the picture of Faerieland crashing to the ground. At the end of the plot, the map was remade to show that nearly all the activities and damaged infrastructure were being rebuilt in a lush landscape on the ground, and most activities were accessible again with new art - an exception was the [[Faerie Quest]]s, which remained closed during rebuilding until 7 February. Faerieland was never rendered inaccessible at any point of the plot. | *By the end of 24 November, the description on Faerieland's main page was gone, replaced by a link to the picture of Faerieland crashing to the ground. At the end of the plot, the map was remade to show that nearly all the activities and damaged infrastructure were being rebuilt in a lush landscape on the ground, and most activities were accessible again with new art - an exception was the [[Faerie Quest]]s, which remained closed during rebuilding until 7 February. Faerieland was never rendered inaccessible at any point of the plot. | ||
=== | === Cameos and references === | ||
The titles and descriptions of the Fearless Deeds often contained jokes or references to other media. These are linked to in the walkthrough above. Additionally: | |||
*Reference was made in the plot to the fate of [[The Darkest Faerie]]. | *Reference was made in the plot to the fate of [[The Darkest Faerie]]. | ||
*Both this plot and the video game [[Neopets: The Darkest Faerie]] had the scene of Faerieland dropping to Neopia. | *Both this plot and the video game ''[[Neopets: The Darkest Faerie]]'' had the scene of Faerieland dropping to Neopia. | ||
*[[Captain Rourke]] made a [[wikipedia:cameo appearance|cameo]] in chapter three as a patron at the bar. | *[[Captain Rourke]] made a [[wikipedia:cameo appearance|cameo]] in chapter three as a patron at the bar. | ||
*[[Kanrik]] made a cameo in chapter seven in a flashback as one of the people [[Hanso]] robbed. | *[[Kanrik]] made a cameo in chapter seven in a flashback as one of the people [[Hanso]] robbed. | ||
| Line 1,348: | Line 1,346: | ||
=== Goofs and inconsistencies === | === Goofs and inconsistencies === | ||
*The [[Wikipedia:English in the Commonwealth of Nations|Commonwealth English]] spelling of ''art'''e'''fact'' is used throughout the plot, although ''art'''i'''fact'' is used elsewhere on the [[Neopets]] site. | *The [[Wikipedia:English in the Commonwealth of Nations|Commonwealth English]] spelling of ''art'''e'''fact'' is used throughout the plot, although ''art'''i'''fact'' is used elsewhere on the [[Neopets]] site. | ||
*Some faeries were not shown as petrified during the plot, including [[Siyana]] of Altador or [[Bree]] the Keyquest Faerie, | *Some faeries were not shown as petrified during the plot, including [[Siyana]] of Altador or [[Bree]] the Keyquest Faerie, this was not a clue but an [[wikipedia:Goof|oversight]]. | ||
*The [[Ogrin Master|Ogrin]] is never named at any point during the plot - and he was simply referred to as "The Ogrin Master" in the epilogue. | *The [[Ogrin Master|Ogrin]] is never named at any point during the plot - and he was simply referred to as "The Ogrin Master" in the epilogue. | ||
*In the [[Games Master Challenge 2010]], several qualifying games were unavailable since they were set in Faerieland. However, there were no challenges that required those games to be played. | *In the [[Games Master Challenge 2010]], several qualifying games were unavailable since they were set in Faerieland. However, there were no challenges that ''required'' those games to be played. | ||
*No statue is shown to have fallen over after being petrified - even ones in the middle of movement (walking, dancing, battling, etc.), even though it would be very unlikely that they would have been balanced enough to stay on their feet at the moment they were frozen. | *No statue is shown to have fallen over after being petrified - even ones in the middle of movement (walking, dancing, battling, etc.), even though it would be very unlikely that they would have been balanced enough to stay on their feet at the moment they were frozen. | ||
*Even after the Water Faerie returned, the [[Healing Springs]] still failed to grant anything other than items until the first workday of the new year (3 January 2011). | *Even after the Water Faerie returned, the [[Healing Springs]] still failed to grant anything other than items until the first workday of the new year (3 January 2011). | ||
Latest revision as of 23:58, 11 August 2018

The Faeries' Ruin was a plot that started on 20 September, 2010 and concluded on 24 December. Puzzles remained open for completion until midnight on 1 January, 2011, and an epilogue and prize shop was released on 26 January†. It documented the journey of a band of heroes through Neopia as they tried to undo a curse on the Faeries and rescue Faerieland.
The plot opened with the interruption of the Faerie Festival as nearly all of the faeries in the world mysteriously turned to stone. Without the faeries' magic, Faerieland began sinking towards the ground, and shadowy monsters began to emerge. During the course of the plot, nearly all activities that involved faeries — from the games and shops on Faerieland to the Neggery and the Cooking Pot — were suspended due to the faeries' condition.
The plot starred several new characters, including Brynn, a female Kougra knight, Hanso, an Ixi thief, and Xandra, a Xweetok sorceress. It also revisited several characters who have appeared in previous plots, including Jazan of Lost Desert Plot fame and King Altador.
Players participated in The Faeries' Ruin through individual puzzles, cooperative puzzles, and the Battledome in roughly equal amounts. It also introduced achievements, termed "Fearless Deeds", which were awarded for certain miscellaneous accomplishments in each plot step.
Like The Cyodrake's Gaze plot, parts of the story had unreliable narrators. Beginning on 10 November 2014, the plot comics were re-released on the Madefire platform, a motion comics app.
The Faerie Festival would be disrupted by Wraiths again in 2017 due to The Wraith Resurgence.
Synopsis[edit]
During the Faerie Festival, all the Faeries were turned to stone by a mysterious artefact. A band of a heroes came from across Neopia in order to find the culprit responsible and devise an antidote - but then the shadows came alive and began to attack. After retrieving a spell book and a second artefact, one of the heroes - Xandra - began a complicated ritual to restore the Faeries.
However, Xandra betrayed them: Faerieland crashed east of the Haunted Woods and she turned most of the heroes to stone. Xandra, it was revealed, was the villain all along: she saw them as tyrants who kept their magical power to themselves instead of using it to help the rest of the planet, and turned them to stone to begin with.
Hanso - one of the heroes who escaped the second petrification spell - stole the first artefact and used it to absorb some of Xandra's spells. He smashed it, the magic was released, and he and Xandra were turned to stone as well. This broke the curse holding the Faeries, and Fyora was able to restore Hanso to life. The heroes returned to their nations, and the Faeries started work rebuilding their city in its new home.
Story[edit]

At the Faerie Festival, all the Faeries had been turned to stone, and Hanso the Ixi was looking for things to steal.
He was not the Festival's only visitor. Several Neopian lands had sent representatives to investigate the crisis: from Altador, King Altador and his guards, from Brightvale, the knight Brynn, and from Qasala, King Jazan.
Hanso tried to sell them information. Brynn and Hanso recognised each over from the time he had spent in Brightvale's dungeons, and neither she nor King Jazan were keen to trust him. He was, however, their own lead, so they agreed to hear him out.

Hanso explained that as he was on the way to the festival - "You mean you were going to steal from the faeries at their festival." - he saw Hubrid Nox, who was holding a shiny artefact and chanting an incantation. After a blinding flash of light, Nox had vanished and all the faeries had become stone. Although Jazan and Altador doubted Hubrid Nox would be powerful enough to curse all the faeries, Brynn vouched that he would have no reason to lie, and that the artefact Hanso claimed to have seen may have something to do with it.
The group headed in to Faerie City to see Xandra, a Xweetok who too was investigating the curse. On seeing Hanso, however, she became enraged - he had stolen several valuable artefacts from her hut earlier.

Hanso confessed that while he didn't lie about seeing Hubrid Nox, it wasn't the whole truth - he had broken into Xandra's hut, too.
Hanso explained that after he had stolen from Xandra, he put the word out that he had four magical artefacts to fence. He was contacted by a buyer who wanted to meet in Faerieland - Hubrid Nox. Nox was only interested in one of the artefacts, and Hanso tailed him to see what he would do with it: as Hanso had already explained, he chanted, there was a flash of light, and all the faeries turned to stone. Xandra still didn't trust Hanso's word, but Brynn and Altador were convinced, and went to recover the artefact from Nox before he could do any more damage with it.
The group - Hanso under guard - arrived at Castle Nox in the Haunted Woods. As they formed their plan to storm the stronghold, Hanso slipped away. Brynn went after him - as Nox could appear any second, they couldn't afford to delay their plan.
Brynn found Hanso climbing over the wall away from the front gates - he said that he would find his own way in.
|
“And how do I know you're not going in there to tip him off?” “Well, if you don't trust me, you could always stop me.” |

As soon as Hanso snuck in through one of the castle windows, he was spotted by Nox. Hanso asked Nox about the artefact - but Nox didn't seem to know what he was talking about. At that moment, an alarm went off, and Nox saw through his crystal ball Altador and the others storming the gates. Nox opened a secret passageway, threw the crystal ball at Hanso, and made good his escape.
Brynn rushed in and the door sealed behind her - through the crystal ball, Hanso and Brynn could see the others were sealed in as well. The pair followed the secret passageway Nox escaped through - Brynn all the while berating Hanso for letting Nox escape - and found a strange wooden control board.
Meanwhile, out in the Haunted Woods, Hubrid Nox ran away from his castle, gloating over his escape - before running straight into another Hubrid Nox, who blasted him to the ground.
After Brynn and Hanso used the control panel to help the rest of the heroes escape, Jazan accused Hanso of letting Nox escape and blamed him for getting trapped in the castle. Although Hanso protested that he helped them get out of the castle, they overruled him, and decided to proceed without him. They argued over where Nox could have gone, when Faerieland, surrounded by sinister purple clouds and crackling lightning, appeared overhead. Altador suggested that the faerie's condition had adversely affected the city, when the group was attacked from all sides by shadowy monsters.

Jazan reasoned that the monsters they were fighting could not belong to Nox, as his minions are ghosts. Hanso and Altador realised that the wraiths were distracting them from the sinking Faerieland, and between waves, they resolved to split up. Brynn would go to Brightvale's library to see if there was anything they could use, and take Hanso to the dungeons there. Xandra said she should research more on faerie artefacts as well. The rest of the team would remain to see if the wraiths led them to Nox.
Brynn and Hanso reminisced as to the first time they met, and after a while Xandra excused herself to go to her own books. When they reached Brightvale, they noticed the colour seemed to have gone from it. Brynn dutifully locked Hanso up, but promised she would return after going to the library.
Brynn found a book with a picture of a larger artefact that resembled the one Hanso stole. She showed him the book in his jail cell when sounds of a battle reached them - Brightvale was under attack. She gave Hanso the book to look after as she rushed off to help. After she left, Hanso used his belt to grab his lock picking equipment from outside the cell and broke out. He called for the guards, and as they rushed in, smacked their heads together.
Outside the castle, Brynn and the Brightvale guards were fighting the Shadow Spectres in the streets. Hanso rushed to her aid, and tried to get her to leave with him, noting that without Altador, Jazan, and the others, they didn't stand a chance. Brynn told Hanso it wasn't his fight and that she didn't expect him to stay. Brynn lost her sword killing a Spectre and was carried off by them, Hanso was surrounded and escaped by using a catapult to throw him out of the city.
The Spectres carrying Brynn took her out of the city to a cave. On the way, she shouted for Hanso to take the book to Altador, but he followed her instead.
Brynn met Xandra in the cave, who said she had also been captured. The other people in the cave seemed ill: Xandra thought the Spectres were feeding off them somehow. She wanted to know if Brynn had found a solution, and suggested the writing in the book may have been a puzzle of some kind. With the help of Hanso, who had snuck into the cave by piggy-backing on one of the Spectres, the trio managed to escape.

On examining the book, Xandra stated that it did not contain a counter-spell, but a map to some ruins. Hanso recognized them - they were one of the safe houses when he was a member of the Thieves' Guild. As it was their only lead, the trio travelled to the ruins, hoping to find something they could use. Within the ruins, they ran into more ghouls and split up. Xandra and Hanso found another artefact that looked like it was connected to the one used against the Faeries.
Hanso was wary of traps and asked Xandra if she had a bag of sand, but she rolled her eyes and just grabbed the artefact, which didn't seem to be booby trapped after all. They met up with Brynn again and decided to head back to the Haunted Woods, hoping the second artefact could undo the spell the first one cast.
When they arrived, they discovered wraiths were still hounding King Altador and the heroes. After they fought off the wave, Brynn told them of their discovery.
“It's worse than just Faerieland sinking. King Altador, I think all of Neopia is in terrible danger...”
Brynn explained that it seemed all of Neopia seemed drained, and everything was decaying or dying. Jazan wondered if the Faeries were more involved in the well-being of the planet than they had realised. With time running out, they needed to reverse the spell as soon as they could, and Xandra resolved to try. They moved out in to the open, and Brynn and Hanso held the artefact up for Xandra while the heroes defended them against the renewed forces of the wraiths.

As the ritual was completed, there was a shockwave from the artefact. Hanso picked himself up, and saw Brynn lying on the ground, while outside of Xandra's magical barrier, the heroes had been turned to stone. The Phantoms closed in on Xandra, who scoured them away with green flames. Hanso stared in shock as the Xweetok stood with an evil glint in her eye and Faerieland crashed behind them in a shower of fireballs. It was at this point that Hasno and Brynn had learned the horrible truth: Xandra wanted Faerieland to fall...
“It was a symbol, Brynn. That's all. Symbols have power, and getting rid of that symbol is something that Neopia has needed for a long, long time...”
Xandra explained that some time ago, the Faeries had seen her magical potential and brought her to their kingdom to study with them. However, she learned that far from being Neopia's protectors, the Faeries had great power but hardly ever intervened. She urged them to get more involved, but they refused. This was an unreasonable injustice to Xandra, and she grew to see the faeries as "winged tyrants", and Faerieland their symbol of power.
Hanso remembered the 'Nox' he saw cast the spell called Faeries "winged tyrants" - and realised 'Nox' must have been Xandra in disguise. Xandra said the world would be better off under a Neopet ruler: her. The artefact Hanso had stolen and the sibling they found in the ruin had both served to amplify her magic so she could overwhelm the Faeries. The shadowy wraiths, spectres, and phantoms, who had been plaguing Brightvale and the Haunted Woods, were a side-effect from the petrification spell unintended by Xandra.
Xandra hoped to rebuild Neopia with Neopets and their own strengths, not through the blessings of the faeries. Seeing their potential, she offered Brynn and Hanso a chance to join her: Brynn refused at once, but Hanso listened. Xandra said that if Hanso helped her rebuild, he would be remembered as a hero, not a thief. Recalling the distrust from his fellow heroes - including Brynn - and despite Brynn begging for his help, Hanso instead seemed to agree to Xandra's offer.

However, it was a ruse! Hanso snatched the smaller artefact from Xandra and threw it to Brynn, telling her to destroy it. Brynn hesitated in the confusion, which gave the Xweetok witch enough time to summon it back. Hanso grabbed the artefact from the air as he and Brynn fled.
Enraged, Xandra summoned a giant Wraith called Oblivion to kill Brynn while she dealt with Hanso. The Ixi absorbed her attacks into the artefact while goading her with insults, and when it was full of energy, he shattered it with his dagger. There was a burst of green light, and the clouds parted. Brynn defeated Oblivion, and rushed over to Hanso - but both Hanso and Xandra had been turned to stone.

Not long after, King Altador and his guardsmen, King Jazan, the Ogrin Master, and even Queen Fyora arrived as the dust settled; all free from Xandra's petrification spell. The Faerie Queen freed Hanso from the effects of the broken mirror. After everyone congratulated the thief for his heroism, Fyora explained that Xandra had underestimated the Faeries' involvement in Neopia, as their magic was needed to protect the world from the wraiths. She then disappeared with the petrified Xweetok, asking Hanso to meet up with her later.
Hanso revealed to his allies that beforehand, he saw something in the book from Brightvale that helped him break the spell, freeing everyone from their stone predicament. He then confessed that he was lucky that Fyora freed him. The group began to go their separate ways: Altador and his men returned to their own kingdom to see if there was any damage done from the days past, while Jazan and Hanso discuss buying some of the jewellery Hanso had stolen for Nabile as a gift.
Epilogue[edit]
Hanso told a young Wocky named Timmy about the events that followed Xandra's downfall.
The faeries set about restoring their home, hoping one day that their magic would be strong enough to restore Faerieland to the skies. King Jazan returned to Nabile in Qasala, the Ogrin Master returned to Shenkuu to teach his students about fighting the Wraiths, and King Altador went on an adventure to retrieve the statue of The Darkest Faerie, which had been in Faerieland since the events of Neopets: The Darkest Faerie and lost during the crash.
Fyora appointed Brynn captain of her guards, while Hanso was given the title of Master Thief by his former guild. In the end, they were tasked with retrieving harmful faerie artefacts from across Neopia to prevent them from falling into the wrong hands.
Brynn was worried that Hanso would encourage Timmy to follow in his thieving footsteps, but Hanso reminded her that if he wasn't a thief, they may never have met.
Participation[edit]
The player could participate in this plot, like in the Tale of Woe, by solving puzzles that are released after certain chapters of the story. Solving puzzles, and solving them in specific ways, earns the player achievements called Fearless Deeds. Achievements are often named after internet memes.
The first puzzle was linked to at the bottom of the second chapter. The second puzzle, by contrast, had to be found in the Deserted Fairground of the Haunted Woods, like the puzzles in the Tale of Woe plot. All subsequent puzzle steps had to be found by the players as well. The third, fifth, and seventh steps were battles which took place in the Battledome, and had a dedicated page to keep track of their progress.
Xandra's Library[edit]
The first task the user is asked to do is to guide Hanso in a 'retelling' of his first encounter with Xandra. The player must move Hanso around Xandra's library and pick up the four artefacts - which are each glowing green - and then make it to the exit, without Xandra shooting Hanso with magic.

|

|

|

|
If Hanso is hit, or if he leaves the library without getting all the artefacts, it is indicated as an error in retelling the story - Xandra or Hanso will answer that it didn't happen as such, and the user can try again.
Also in the library are three items that are not glowing. These are bonus items, and can be collected in addition to the artefacts. If Hanso escapes with all the artefacts and with one or more of these bonus items, the bonus items will appear in the player's inventory.

|

|

|

|

|

|
The player moves Hanso by clicking a square adjacent to him that is not blocked by a table, a bookshelf, a wall, Xandra, or a pile of rubble. The player then clicks anywhere on the map to see what Xandra's move was - she may shout at the player, run after him, teleport to a random location in the library, or shoot a blast of magic across the map. Unlike Hanso, she does not run diagonally, and nor can she shoot her magic diagonally.
After Hanso has escaped, the library task may be replayed to obtain other achievements or the rest of the bonus items.
Fearless Deeds[edit]
- The Artefact Thief - Hanso, a well-known rogue and thief, breaks into an old library inhabited by Xandra, a renowned scholar, and steals several valuable artefacts.
- Complete the puzzle by escaping with all four artefacts.
- Ooh, Shiny! - Pick up the artefact that started this whole mess.
- Pick up the mirror artefact - the player doesn't need to escape with it.
- The Task at Hand - Avoid being distracted by irrelevant fripperies.
- Escape with all the glowing artefacts but without any bonus items - this is also earnt if the puzzle is completed after all the bonus items have been taken on previous play-throughs.
- Proximity Warning - Narrowly escape Xandra's scholarly wrath.
- Be at some point within one square of Xandra but still escape.
Castle Nox[edit]

The second task bridges chapter four and chapter five - the player is asked to solve a puzzle using Nox's control panel to allow the rest of the adventurers, who are locked in the castle, to escape. The other heroes are divided into three groups, distributed across the the four floors - second, first, ground, and basement - of the castle. They must be guided to the front door on the ground floor.
The layout of each of the floors is randomised each time the puzzle is played. The location of each group is indicated by a risen bronze peg. The doorways between the rooms are colour-coded red, green, or blue. They player can open all the red doors, or all the green doors, or all the blue doors, at once. If some of the heroes are in a room where one of the doors open, they will go through it into a different room.
The player has to choose five colours at a time, which then open in sequence. The player chooses these colours by clicking the light bulbs at the bottom of the control panel. The brass arrow cycles through the three colour choices as the player clicks. Once all five colours have been assigned, the doors open sequential left to right. Only one set of coloured doors can be open at a time - opening the green doors after you've opened the red doors will shut all the red doors.
In certain rooms are staircases - when a group enters a room with a staircase, they will immediately go up or down it and out of the room at the other end. In other rooms, there are certain traps, as denoted by small grey tiles on the control panel. These traps - from Wadjets - "Why did it have to be Wadjets?" - to scarabs (a reference to the Lost Desert Plot) - cause the group affected to miss whatever door opens next. Three of the tiles are not traps - one is a gold key, which must be found and used to unlock the front door - one is a room full of Usukis, and one is a room full of ice cream.
If two or more pegs reach the same room, the groups will join up and be represented as only one peg. This new group will stay together from then on. The group who found the key - or whatever group they eventually joined up with - must reach the front door first to unlock it for themselves and the others.
If a group is in a room where more than one door opens, they may not necessarily go into the room the player intended. The decision appears to be arbitrary.
This puzzle can also be played more than once to achieve all the Fearless Deeds.
Fearless Deeds[edit]
- Nox's Locks - The heroes are trapped in Nox's castle! But Hanso and Brynn have found some kind of strange machine that might let them help the others escape.
- Collect the key and get all three characters to the exit. Due to a bug when this puzzle was first released, it may not have been achieved when the puzzle was completed successfully, although this was later fixed.
- We All Scream - Everyone loves an ice-cold bowl of Chintzy Mynci... even Hubrid Nox.
- Fort Nox - There's gold in them thar halls!
- One of the rooms with no more than two different coloured doors will trigger this when a group is in it and a colour not represented by the doors is selected - e.g. in a room with red and blue doors, choosing green causes a 'secret' door to open, visible to the group in the maze, with the treasure in. Which room it is, and which colour door must be opened, is random. This gives the player the toy item Hubrid Nox Treasure Chest, which can be opened to obtain a Spooky Petpet.
- And One For All - "After you." "No, after you." "No, I insist! After you."
- Exit through the gold doors with all three characters together.
Shadow Wraiths[edit]
The third step involves players' Neopets reinforcing the heroes in battle, joining one-player fights in the Battledome against three types of ghostly Shadow Wraiths - Shadow Wraith Minion, Shadow Wraith Brute, and Shadow Wraith Fury. The different types of wraiths were released over the weekend of 8-10 October, one per day, with increasing difficulty (beginning at 8, 25, and 40 hit points respectively).
Wraiths are released in waves, and all of the wraiths must be defeated before new waves of any type arrive. No other one-player Battledome opponents are available during this time except for Punchbag Bob. This step is collaborative - the totally statistics take into account all the players who have participated across the site, and the number of wraith a player can fight in any wave is reduced by how many wraith have being beaten by other players.
|
|

|
| From left to right, Shadow Wraith Minion, Shadow Wraith Brute, and Shadow Wraith Fury. | ||
A kill cap was introduced - 50, 40, and 30 wins for the minion, brute, and fury respectively. A wraith defeated through a win or a draw counts towards this cap. While a player can continue to fight beyond this cap so as to get to speed up the next wave or to participate in higher tiers (see below), those kills will not count towards their plot score. After all the win caps have been reached, if a player continues to fight wraith, they have the chance of winning a bonus item after each win.
Battling these Wraiths can decrease the fighting Neopet's happiness.
Battle page[edit]
| Mass Destruction Prize Tiers | ||
|---|---|---|
| Tier # | Total kills | Prize |
| 1 | 750,000 | Bubbling Healing Goo |
| 2 | 1,500,000 | Essence of Everlasting Apple |
| 3 | 2,250,000 | Sparkle Potion |
| 4 | 3,000,000 | Super Icy Negg |
| 5 | 3,750,000 | Downsize! |
| 6 | 4,500,000 | Ornate Fighting Fan |
| 7 | 5,250,000 | Ultra Icy Negg |
| 8 | 6,000,000 | Thick Smoke Bomb |
This step introduced a battle page that keeps track of the progress of the total battle. It records when each opponent was released and lists the total numbers of each opponent that have been defeated. It also records progress to each of the tiers.
The total hoard is divided up into tiers of 750,000 kills totalled across every participant on the site. Participating in a tier - by defeating a wraith during it - qualifies the player for a prize when that tier is defeated. even if they have already reached the kill cap. The prize is not unveiled until the end of the tier. On 13 October at 22:36 NST, the waves stopped coming, and tier 9 was left incomplete.
The page also gives updates on the battle from the principle cast:
- During waves:
- Brynn: There's no time to waste! We've got to defeat these... whatever they are... before they wear us down!
- Hanso: Well, hand-to-hand combat isn't my best skill, honestly, but if any of those creatures slip past the others, I suppose I'll have to make short work of 'em.
- Altador: We are under attack, my friends! Get yourself into the battle at once. There's not a moment to lose!
- Xandra: Ugh! I should have stayed in my library. At least I can do some damage to these... these... whatever they are!
- Jazan: These foul spirits are no match for our strength! They'll have felt our wrath before the day is through!
- Ogrin: An enemy's greatest strength is also his greatest weakness. We must use these creatures' power to our advantage.
- Between waves:
- Brynn: It's going to be tough if this keeps up. Those monsters give me the creeps.
- Hanso: That was pretty easy. Sure, I didn't do much actual damage, but I'm worth any three of the others.
- Altador: Rest while you can, my friends. We've defeated this wave, but we may be attacked again.
- Xandra: That was a tough fight. I'm glad we were able to hold out, but... what about next time?
- Jazan: Such weak enemies. They will be no match for our might, should they rise against us again.
- Ogrin: The warrior who waits until the most opportune moment has the greatest victory. Now is the time to rest.
While the Skeith soldier provides comic relief:
- I'll go back to the battle, just as soon as I find my contact lense.
- Every time I look at one of those wraiths, I see my life pass before my eyes. Hey, there's the time I ate fifty doughnuts on a dare!
- Wow, Jazan sure can be a vicious fighter! I'm glad he's on our side.
- I'll guard Hanso. Got to make sure that clever thief doesn't escape!
- I never like to fight on an empty stomach.
- I could help fight, but I think Altador has things under control.
- Why spooky wraiths? Couldn't we get attacked by some fluffy Babaas?
- Why couldn't I have gone to culinary school like my mother said I should?
- Does anyone else feel cold? I should have brought my coat.
- Did someone say ice cream?
- This is the most excitement I've had all year!
Fearless Deeds[edit]
- Into the Fray - Ambushed in the woods by strange, ethereal wraiths, the heroes find themselves surrounded and outnumbered. Get to the Battledome and help them!
- Defeat a wraith.
- Shadow Wraith Minion - kill counter, but points are capped after 50 kills.
- Shadow Wraith Brute - kill counter, but points are capped after 40 kills.
- Shadow Wraith Fury - kill counter, but points are capped after 30 kills.
- A Winner Is You! - Good, you managed to avoid stabbing yourself. Now get back into the fight!
- Defeat any wraith once.
- Stand Your Ground - A good defense is the best... defense.
- Use the defend stance for three rounds in one battle. They do not have to be consecutive.
- Five of a Kind - If this keeps up, we'll win this battle in no time.
- Defeat at least five of each wraith.
The Finneus J. Scrollbottom Auxiliary Surplus Archives[edit]
Refreshing at the map of Brightvale eventually causes a text link to appear beneath it, reading "You notice a strange door on one side of the castle... how odd." - some people have reported having to turn Adblock or NoScript off in their browsers before it would appear. The link leads to the Brightvale archives, where a relative of the grumpy Yurble foreman is trying to get the library organised for Brynn. Mistaking the player for a library intern he requested, he orders them to get to work sorting out one of the archive's many rooms.
The user must access the archives by clicking on the link beneath the Brightvale map first before they will be able to use the direct link above to get there. After it has been accessed, the link will appear above the Brightvale map, reading "Visit the Finneus J. Scrollbottom Auxiliary Surplus Archives".
“Get down into the archives and find an unoccupied room! We need those shelves organized so that the captain here can find the book she's looking for!”
|
Clicking on the archway in the staircase will take the player to one of several thousand rooms. In each room is a bookcase with four shelves, each shelf is labelled a different topic. The player must put the correct topic of books onto each shelf, and order each shelf correctly. Amongst the books will be several that do not belong, and these may be thrown into adjacent rooms. Each incorrect topic will only belong in one of the two rooms - if it is sent to the wrong one, or if books that belong on the players shelf are thrown away, they will be thrown back.
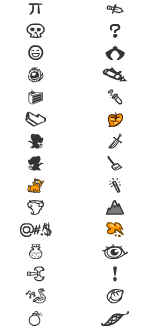
The spine of each book has a coloured head, a symbol, a number, and a geometric shape. There are thirty different symbols (see right), each of which corresponds to a different subject - i.e. a different shelf. For example, the pod of peas (second column, bottom row) corresponds to the shelf Inedible Legumes of Brightvale, and the exclamation mark to Help! I'm Trapped in a Bookshelf Factory.
There should be ten books per shelf for a completed bookcase.
The other features of the spine correspond to the order within a shelf the book must be placed. The order is different for different shelves, but is either:
- Numeric:
- The numbers on the spines are arranged in ascending order, left to right;
- The numbers on the spines are reversed (e.g. "123" becomes "321") and then sorted in ascending order, left to right.
- The sum of the digits on the spines are arranged in ascending order, left to right (e.g. "234" = 2 + 3 + 4 = 9, "413" = 4 + 1 + 3 = 8, "234" follows "413");
- The number each geometric shape represents arranged in ascending order, left to right (i.e. a dot is 1, a line is 2, a triangle is 3, a square is 4...).
- By colour:
- The colours of the top of the spines are arranged as in a spectrum or rainbow (ROYGBIV - Maroon, red, orange, yellow, green, teal, light blue, dark blue, purple, black);
- The colours of the geometric shape arranged as in a spectrum or rainbow.

|
There is a bell on the desk: when rung, the Yurble will arrive and berate the player if there are any books in the wrong place. These will be removed from the shelves and strewn on the desk. Books that are correctly ordered and on the right shelf will be left on the shelves. This refers to the books relative order - if two books are left on a shelf by the Yurble, they are meant to be to be next to each other, and there shouldn't be any books placed in between them. There may be books before and after the pair, however.
When the Yurble removes books from the shelves, there is a chance it may dislodge a bonus item the player wins: "While knocking books off the shelf, the librarian dislodges an item! You pick it up before he notices it."
If all the books are in the right order, and all are on the right shelves, when the bell is rang the Yurble will instead berate the player for taking too long, and the player can return to the front of the library and receive a new room to organise, for example to get any achievements they may have missed.
“Took you long enough! I guess you got this shelf organized, though... *grumble* All right, off with you then. Captain Brynn needs to search this room, and I don't want you getting in her way!”
Brynn found her book sometime on October 18, but the puzzle remained playable. Afterwards, the Yurble greeted the player by saying, "Well, Captain Brynn found her book. But the archives are still a mess! Get down there and organize those books!" And upon completing a room, he instead said, "Well, that's another one cleaned up. Maybe some day this whole place will finally be organized! I sure hope so. I HATE DISORGANIZATION! RRAAAAARGHH!"
Subjects[edit]
The complete list of subjects and how they are organised is as follows:
| Symbol | Subject | Order |
|---|---|---|
| Saxaphone | History of Jazzmosis | Ascending order by number. |
| π | π | |
| Mountain | Terror Mountain Vacation Journals | |
| Battleaxe | Theory of Warfare | |
| Bread | Things a Skeith Won't Eat | |
| Wand | Ineffective Teleportation Spells | Ascending order by reversed number (123 becomes 321). |
| ? | Miscellaneous | |
| Test tube | Potent Potables | |
| Orange goo | Rhymes with 'Jurple' | |
| Diagonal sword | 'S' words | |
| @#!$ | Ancient Shenkuuvian Curses | Ascending order by sum of digits (123 = 1 + 2 + 3 = 5). |
| Orange Meowclops | Forbidden Lasagna Recipes | |
| Horizontal dagger | Implausible Revenge Scenarios | |
| Tooth | Korbat Psychology | |
| Orange leaf | Potpourri | |
| Fountain pen | Incorrectly Labeled Books | Ascending order by number of sides of the polygons. |
| Pea pod | Inedible Legumes of Brightvale | |
| Skull | Mortog Toxicology Reports | |
| Shard of Glass | Stained Glass | |
| Potion | Transmogrification | |
| Bomb | Doomsday Weapons | Rainbow order of spines. |
| Xandra's mirror | Harmful Faerie Artefacts | |
| ! | Help! I'm Trapped in a Bookshelf Factory | |
| Eye | Look Behind You! | |
| Spatula | Things You Find in the Kitchen | |
| Cake | Cakes and Pastries | Rainbow order of geometric shapes. |
| ☺ | Harmless Faerie Artefacts | |
| Mynci pointing left | Histories | |
| Mynci pointing right | Prophecies | |
| Pincers | Unnecessarily Slow-Moving Dipping Mechanisms |
Fearless Deeds[edit]
- Shhhhhhh! - Brightvale's store of knowledge is unrivaled, and Brynn knows there must be something helpful in the castle library's archives... but first there's a little cleaning to do.
- Correctly organise a bookshelf.
- They're Flying Off the Shelves! - Go home, book! Are you too good for your home?!
- Throw away all the books that don't belong on a bookcase.
- Son, I Am Disappoint - You literally could not be any more wrong.
- Call the Yurble with all the books on the shelf in the wrong order, so that all the books are knocked off, including all the books that do not belong on the bookcase.
- First Time's the Charm - You blinded him with library science.
- Don't call the Yurble until all the shelves are correctly organised and the surplus books removed - i.e. the puzzle is complete the first time the Yurble is called.
Shadow Spectres[edit]
| Mass Destruction Prize Tiers | ||
|---|---|---|
| Tier # | Total kills | Prize |
| 9 | 6,750,000 | Dark Vine Potion |
| 10 | 7,500,000 | The Armoury |
| 11 | 8,250,000 | Knowledge and Honour |
| 12 | 9,000,000 | No Sleep Til Brightvale |
| 13 | 9,750,000 | Scroll of the Sea |
| 14 | 10,500,000 | Sparkle Potion |
| 15 | 11,250,000 | Kaylas Potion Of Freezing |
Released following Chapter 8, this is the second Battledome step. Brightvale is under attack, and six new enemies are joining the fight. Like the previous Battledome step, however, this is a collaborative step, and only these challengers and Punchbag Bob are available to fight for its duration. The prize tiers picked up from where they were left during the Into the Fray accomplishment partway through tier 9. Three of the enemies are comparable to the enemies of the last wave, and three of them are a step up in difficulty.
The names of the challengers had been discovered via URL manipulation on 16 October, five days before they were actually released. The discovery occurred on the Battledome Neoboard and was picked up by fansites such as the In-depth Battlepedia.
Unlike during Into the Fray, only two types of enemies arrive in each new wave - Minions and Destroyers arrive together, Brutes and Conquerors arrive together, and Furies and Zealots arrive together.
Only two challengers were available from the beginning, with two more being released the next day, 21 October, at 5:15 NST. The final two types of opponent were released that afternoon at 15:45 NST. The Shadow Spectre Minion, Shadow Spectre Brute, and Shadow Spectre Fury have the same images as the Shadow Wraith Minion, Shadow Wraith Brute, and Shadow Spectre Brute respectively, but different opponent id numbers and different sets of weapons.
|

|
|
| From left to right, Shadow Spectre Minion, Shadow Spectre Destroyer, Shadow Spectre Brute | ||
|
|
|
| Shadow Spectre Conqueror, Shadow Spectre Fury, Shadow Spectre Zealot | ||
The Spectres were finally defeated on 25 October at 23:30.
Battle page[edit]
The battle page also makes a return, with new updates from Brynn and Hanso:
- During the waves:
- Brynn: Keep them away from Brightvale Castle! King Hagan must be protected!
- Brynn: Where do these things keep coming from? We've got to stop them before they tear Brightvale apart!
- Brynn: We haven't got enough soldiers to hold them off forever! Perhaps Meridell can come to our aid.
- Brynn: Don't these monsters ever stop coming? I've lost count of how many of them we've taken out.
- Hanso: The nerve of these things, trying to defeat me in combat! Can't they tell how quick and agile I am? They're just wasting their energy.
- Hanso: It's always good for a thief to practice his skills. Kanrik would be so useless here.
- Hanso: Did you see that last one I took out? It didn't even know what hit it.
- Hanso: And you wanted to keep me cooped up in that cell. Ha! Here come some more!
- Between the waves:
- Brynn: Their attacks seem random, uncoordinated. If they had any strategy, we'd be overrun in short order.
- Brynn: We mananged [sic] to stop that wave, but I'm sure there will be more. We've got to rest while we have time.
- Brynn: Finally, a breather... let's just hope these things don't get any stronger.
- Brynn: I've got to rest. A good soldier always conserves her energy.
- Hanso: Come on, Brynn, surely you aren't so tired as all that? Why, a few million more of these things and I'm sure the battle will end.
- Hanso: I suppose it would be a pity if Brightvale was destroyed... I guess I can stick around.
- Hanso: It's too bad these monsters don't have any pockets for me to pick.
- Hanso: Sure, it's a walk in the park, but destroying these things one after another is just a waste of talents like mine. Maybe I'll take a nap.
With the Skeith once again providing comic relief:
- This is the oddest thing I've seen since breakfast.
- If I wasn't so terrified, I'd show these monsters what's what!
- I'm going to shut my eyes and think about cute little critters.
- Oh, how I wish Altador were here!
- I wish someone would just make these horrible monsters go away! What did we ever do to them?
- Everything's gone pear-shaped!
- What is it with Neopia? If it's not volcanoes or Dr. Sloth attacking us, it's strange shadow monsters...
- What do you suppose they want?
- It's like something out of a nightmare!
- What are these hideous things doing in nice, pretty Brightvale? Although I suppose Brightvale ain't been all that nice or pretty, lately...
- Hey, is that Hanso? I could swear Captain Brynn locked him up in a cell...
Fearless Deeds[edit]
- The Battle of Brightvale - Just as Brynn and Hanso began to examine the book, suddenly a swarm of wraiths descended upon Brightvale. King Hagan's defenders are overwhelmed - get to the Battledome before it's too late!
- Defeat one of the new enemies.
- Shadow Spectre Minion - kill counter, but points are capped after 50 kills.
- Shadow Spectre Destroyer - kill counter, but points are capped after 40 kills.
- Shadow Spectre Brute - kill counter, but points are capped after 50 kills.
- Shadow Spectre Conqueror - kill counter, but points are capped after 30 kills.
- Shadow Spectre Fury - kill counter, but points are capped after 50 kills.
- Shadow Spectre Zealot - kill counter, but points are capped after 20 kills.
- The Welcoming Committee - These new spectres got what's coming to them.
- Achieve a kill against a Destroyer, a Conqueror and a Zealot.
- Six Up, Six Down - Queue up, please! We haven't got all day.
- Achieve a kill (a win or a draw) against every opponent in release order - Minion, Destroyer, Brute, Conqueror, Fury, then Zealot. Losing does not break the streak.
- Well Rounded - Caution is normal, so don't jump to fierce conclusions.
- Use the fierce attack, cautious attack, normal attack, and jump and attack abilities against the Spectres. They do not have to be used in the same battle.
Escape the cave[edit]
This step follows on from Chapter 9, where Brynn and Xandra are trapped inside the Wraiths' cave, and Hanso has arrived to try and rescue them. All three characters are now stuck behind a glowing, magical barrier that's blocking the exit. The player must guide Hanso around the labyrinth on tunnels in order to help them escape. Each maze of tunnels is randomly generated to be unique for each player.
The caves are found by clicking the sign "To Meridell" from Brightvale.
Xandra explains that she's tried blasting the barrier but isn't strong enough to break it: she hears voices from within the cave and suggests that there may be other people who can help them. However, Brynn points out that the caves are pitch black.
There are three stages to this step. The first stage is to navigate the tunnels in the dark so as to build a torch. The second stage is to navigate the now illuminated tunnels and free all the Wraiths' prisoners from the purple goo sapping their life force. The third step is to manufacture a magic wand so that Xandra can focus her energy and destroy the barrier.
The torch[edit]
From the first cavern, there are three tunnels - one of which is blocked by the magical barrier. The other two lead deeper into the caves, where it is pitch black. Each cave is connect to two, three, or four others via tunnels. Inside each cave, the player can feel along the side for tunnels, search the floor, call out a greeting, or flail their arms about. In five of the caves are a trapped Neopet.
To construct the torch, the player must find, in any order:
- A stick;
- A can of fuel;
- A rag.
This items are obtained either from searching the floor - which can also give the player a bonus item to be put in their inventory - or from greeting another prisoner who has it.
|
|
|
|
| From left to right, the stick, the rag, and the fuel. | ||


Each cave is described as having one distinguishing feature - it may be very quiet, have a hum, smell faintly of something rotting, have a faint scrabbling sound, be as quiet as the grave, be filled with a rotting stench, be filled with an odd smell, make faint echoes, smell musty, or have the sound of something dripping in the distance. Each player's cave network will have around twenty caves, and some of these descriptions will be reused - i.e. there may be more than one cave in the maze which has an odd smell, etc.
Feeling around the side of cave allows the player to identify the tunnels leading off from the cave. Each tunnel also has a feature. None of the tunnels leading off one cave will have the same feature. These features are:
|
|
One of the tunnels will lead back to the previous cave. To complicate the matter, however, the other end of the tunnel (the end in the cave it leads to) may not feel the same. A tunnel can be, for example, jagged and sharp on one end, and quite moist on the other. This can make back tracking difficult. Feeling along the walls of a cave always brings the tunnels up in the same order, but it may begin at a different place if the player enters the cave from a different tunnel.
| 1. | Hum | |
| Very cold → | Home | |
| Very smooth → | 2. | |
| 2. | Very quiet | |
| Little bit damp → | 1. | |
| Very smooth → | 3. | |
| Slightly bumpy → | _ | |
It is not always immediately apparent if the cave the player has just arrived in is one they've already been through. Keeping a record of the player's movements may make this easier. The player may wish to map the tunnels visual as they explore by drawing a network diagram like a tree diagram. This can be made difficult, though, as the player is given no indication of which direction they are heading in, which can make tunnel connections unclear. An alternative way of "mapping" the tunnels would be to number each one, give its characteristic and list all the tunnels going off from it. The player can number the next cave and indicate which tunnel lead there, e.g. see right.
Once all three items are found, the player should then return to the first cave, where the barrier is. The items will be assembled into a torch, which Xandra will light, and Hanso is sent back into the tunnels to rescue the Neopets.
Rescuing the prisoners[edit]
The player must return to the tunnels to find the five Neopets and free them from the purple goo trapping them. The player can now see each cave and the mouths of the tunnels leading off.

|

|

|

|

|
| From left to right, Kali, Mike, Victor, Charlie, and Oscar. | ||||
Unfortunately, although the tunnel network is the same as when Hanso was building the torch - each cave has the same number of tunnels and connects to the same caves - the player can no longer tell what each tunnel feels like. Each cave will still be identified by the same characteristic, so if a very quiet cave connected to a faint scrabbling in the first stage, one of the tunnels leading off the very quiet cave will still lead to the faint scrabbling cave.
The player must click the mouth of a tunnel to travel through it.
The five Neopets are each in a different room. When the player clicks on them, they will be asked to extract the Neopet from the tendrils of goo holding it. The player will be able to pull the left or right arm or the left or right leg to help the Neopet get free. The tendrils move in five different ways, they either:
- Pulse threateningly;
- Ripple oddly;
- Undulate slowly;
- Vibrate gently;
- Waver strangely.
Which action the tendrils are doing decides which limb is the correct one to pull. For each action, there are two or three limbs that can be pulled to help free the pet. The tendrils will lash out at the player if they pull the wrong limb and they have to start over again. Five correct pulls in a row will free the Neopet.
Which limbs are okay to pull for which action is random for each player, but is the same for that player for every Neopet and every play-through of this puzzle.
After they are freed, the Neopet will follow the player around the caves. If the player passes through the first cave, with Xandra and Brynn, the Neopet or Neopets following will wait there instead. Once all five Neopets have been brought to the first cave, this step is completed.

|

|

|

|

|
| From left to right, Kali, Mike, Victor, Charlie, and Oscar, free at last. | ||||
Build a wand[edit]
The final stage of this step has the player assemble a wand that Xandra can use to focus her power and blast open the barrier. The rescued prisoners empty their pockets, and provide nine different items to construct the wand with.
The wand needs three components: something to focus with, a handle, and a binding. Of the nine items the player is given, there are three of each category.
|
|
|
|
| The gemstone, lens, and odd crystal are all focusers. | ||
|
|
|
|
| The fancy cane, feather duster, and soup ladle are all handles. | ||
|
|
|
|
| The length of rope, old belt, and pipe cleaners are all bindings. | ||


The combination that will work for a user is random, but will consist of three items, one from each category - for example, the odd crystal, the fancy cane, and the pipe cleaners; or the lense, the ladle, and the length of rope. The player clicks three items - selected items become outlined in red - and attempts to construct a wand. There are 27 possible combinations of each type of item. Xandra's feedback tells the player how many of their choices were correct.
- "No, no, that's not right at all! I need one of each of the three types of item. Are you even paying attention?"
- There was not one of each different category of item in the combination.
- "Hm, those fit together right... but they don't do anything. I don't even get a sense that any part of this wand could do magic. Let's try again."
- None of the items are in the final solution.
- "That's closer to being right... I'm not sure which parts are working, but I definitely can sense some magic potential in this wand. Let's try something else."
- One of the three items is in the final solution.
- We're almost there! This wand is almost built in a way that I can actually use it. Maybe just one more thing needs to be right...
- Two of the items are in the final solution.
The player can thus solve this puzzle like a simplified game of Mastermind - or its Neopets equivalents, Codebreakers or Time Tunnel.
Once the correct combination is found, the puzzle is complete. It can be replayed for the rest of the achievements or other random prizes in the first stage.
Fearless Deeds[edit]
- The Shadows Beneath - Brynn has been captured, but Hanso goes against his better judgment and follows after her. He, Brynn, and Xandra are trapped in a cave by the evil wraiths, and must find a way to escape.
- Complete the puzzle.
- How Many Tunnels Must An Ixi Walk Down? - Uh, all of them, I think.
- Pass through each of the caves at least once.
- The Goo Whisperer - You've got purple on you.
- Free each of the prisoners without making any mistakes.
- Never Gonna Shut You Up, Never Gonna Quiet You Down - Seal your cake receptacle, you conniving mountebank!
- Shout out a greeting to the same prisoner ten times in a row. (There must be a prisoner in the cave at the time.)
Shadow Phantoms[edit]
| Mass Destruction Prize Tiers | ||
|---|---|---|
| Tier # | Total kills | Prize |
| 16 | 12,000,000 | Dark Fire Potion |
| 17 | 12,750,000 | Fiery Sun Scroll |
| 18 | 13,500,000 | Scroll of Moon Light |
| 19 | 14,250,000 | Gold Handled Short Sword |
| 20 | 15,000,000 | Magical Healing Potion |
| 21 | 15,750,000 | ? |
Released following Chapter 12, this is the third Battledome step. Hanso, Brynn and Xandra are trying to reverse the spell, and nine new enemies are trying to stop them. Like the previous Battledome steps, however, this is a collaborative step, and only these challengers and Punchbag Bob are available to fight for its duration. The prize tiers picked up from where they were left during The Battle of Brightvale accomplishment partway through tier 16. Three of the enemies are comparable to the enemies of the first battledome step, three of them comparable to the second battledome step, and three of them are a step up in difficulty.
Unlike in the previous steps, additional phantom reinforcements were sent without waiting for all of the previous wave to have been destroyed.
Only the first three challengers were available from the beginning. The Shadow Phantom Minion, Shadow Phantom Destroyer, Shadow Phantom Fury, and Shadow Phantom Zealot have the same images as the Shadow Wraith Minion and Shadow Spectre Minion; the Shadow Spectre Destroyer; the Shadow Wraith Fury and the Shadow Spectre Fury; and the Shadow Spectre Zealot, respectively, but different opponent id numbers and different sets of weapons. When this step was released, the Shadow Phantom Conqueror and the Shadow Phantom Brute both have the same stance images as the Shadow Spectre Brute and the Shadow Wraith Brute, even though the Shadow Phantom Conqueror's opponent picture was the same as the Shadow Spectre Conqueror's opponent picture, suggesting that the wrong images were used for his battle stances. This was fixed some time after this step closed.
|

|
|
| From left to right, Shadow Phantom Minion, Shadow Phantom Destroyer, Shadow Phantom Commander | ||

|

|
|
| From left to right, Shadow Phantom Brute, Shadow Phantom Conqueror (see above), Shadow Phantom Annihilator | ||

|
|
|
| From left to right, Shadow Phantom Fury, Shadow Phantom Zealot, Shadow Phantom Tormentor | ||
This step closed to participation with the release of chapter 13 on 24 November.
Oblivion (Boss)[edit]
A collaborative boss opponent appeared early on 23 November. Dubbed Oblivion, this monster was created by the remnants of all the fallen spectres. He began with 10,000,000 hit points.
|
When challenging Oblivion in the Battledome, two icons are shown either side of his name. These change every few hours. The icon that appears before his name indicates to what element Oblivion is weak: dealing this element of damage to him, using a weapon or ability that deals only that element, will reduce his total hit points. However, the icon that appears after his name indicates the element that will be his strong suit; using a weapon or ability dealing only that element, will increase his total hit points instead.
This version of Oblivion was no longer available to fight following the release of chapter 13, but it is not clear if he had been defeated by this time.
Battle Page[edit]
The battle page also makes a return, with new updates from Altador, the Ogrin Master, and Jazan:
- During the waves:
- Altador: We must not give up hope. A true heart will see us through to the end.
- Altador: No matter how many more of them attack us, we must stand strong. This day, all Neopia depends upon us.
- Altador: I dearly hope the ritual works. Faerieland is falling lower with each passing moment, and there seems to be no end to these things!
- Altador: Hah! Take that, foul beasts! None of you shall survive this day!
- Altador: These monstrosities must be destroyed! To arms, my comrades!
- Jazan: If I've learned one thing in all this, it's that I really, really love destroying these monsters!
- Jazan: What fool has the temerity to try to overwhelm me—er, us—with these puny apparitions? Don't they know who they're up against?
- Jazan: None of these creatures can stand against our might. Even the strongest of them are no match for me!
- Jazan: Finally, a chance to use this freshly-sharpened blade!
- Jazan: While senseless destruction has its appeal, I find that it's more fulfilling to engage in sensible destruction.
- Ogrin: I believe that the only way to defeat these phantoms is to turn their own strength against them.
- Ogrin: What is the sound of one wraith clapping?
- Ogrin: These monsters seem like forces of nature, not servants of a master. Could Neopia be attempting to destroy itself?
- Ogrin: Can we say for certain where this will end? Much damage has been wrought, but the sword is all the stronger for its tempering.
- Ogrin: They fight tirelessly, but what do they fight for? In this they are no different than wind, or fire.
- Between the waves:
...to be added...
With the Skeith once again providing comic relief:
- I'm going to shut my eyes and think about cute little critters.
- What is it with Neopia? If it's not volcanoes or Dr. Sloth attacking us, it's strange shadow monsters...
- D'you think that if we offer them some pie, they might leave?
- Oh, how I wish Altador were here!
- I wish someone would just make these horrible monsters go away! What did we ever do to them?
- What do you suppose they want?
Fearless Deeds[edit]
- The Shattered Plain - Brynn, Hanso, and Xandra have found the completed artefact, and meet up with King Altador and the other heroes, only to find a battle already in progress. The ritual to unfreeze the faeries and save Faerieland must be completed before all is lost.
- Kill one of the Phantoms.
- Shadow Phantom Minion - kill counter, but points are capped after 50 kills.
- Shadow Phantom Destroyer - kill counter, but points are capped after 40 kills.
- Shadow Phantom Commander - kill counter, but points are capped after 30 kills.
- Shadow Phantom Brute - kill counter, but points are capped after 45 kills.
- Shadow Phantom Conqueror - kill counter, but points are capped after 35 kills.
- Shadow Phantom Annihilator - kill counter, but points are capped after 25 kills.
- Shadow Phantom Fury - kill counter, but points are capped after 40 kills.
- Shadow Phantom Zealot - kill counter, but points are capped after 30 kills.
- Shadow Phantom Tormentor - kill counter, but points are capped after 20 kills.
- Kill one of the Phantoms.
- The Phantoms' Menace - Wars not make one great.
- Defeat one of each enemy (excluding Oblivion).
- Medium Rare - I found this one in the bargain bin!
- Use a weapon between rarities 45 and 50, such as the Trumpet of Blasting depicted in this deed's icon.
- It's a Magic Number - Then shalt thou count to three, no more, no less.
- Defeat an enemy in exactly three turns.
The following Deeds were added after Oblivion was released:
- Fight Me Once, Shame On You - Fight me more than once, and earn a chance to win valuable cash prizes! ...Maybe.
- Finish a battle with Oblivion, regardless of result.
- The Three Phases of Evil - He's good at everything... just not at the same time.
- Battle three different rotations of Oblivion's icon weakness.
- You're Doing It Wrong - Stop healing him, you cowards!
- Inflict icons on Oblivion of the type that increases his hit points (the icon on the right side). (excluding items that deal reflecting icons.)
The Ritual[edit]
This step was released the day following the release of the Shadow Phantoms in the Battledome, while the Phantoms were still available. It is a collaborative puzzle where the players help Xandra, Hanso, and Brynn cast the counter-spell. There are two main tasks: reinforcing the energy barrier and deciphering the spells.
If the next spell in the sequence has been deciphered, Xandra can start work on it. If the barrier fails during this time, progress on that spell will be halted until the barrier is replenished, and Xandra can go back to her work.
Before Faerieland fell, ten spells had been completed.
Deciphering Spells[edit]
Xandra needs to cast a sequence of spells to complete the ritual, but she does not know what order to cast the spells in. There are a million spells in the book, and each spell is protected by a magical cipher.

|
At the top of each enciphered spell is a title with seven symbols. Players decipher the page by clicking the three symbols in the title that correspond to the three least-used symbols in the page of text below. This can be done quickly by estimation - the three correct symbols are quite rare, and the others in the title are quite common. The order the symbols are selected does not matter. When the page is deciphered, Xandra can decide if it is the right one or not.

|
| 1 | 2 | 3 | 4 |
| 5 | 6 | 7 | 8 |
| 9 | 10 | 11 | 12 |
| 13 | 14 | 15 | 16 |
| 17 | 18 | 19 | 20 |
Each spell also has an index code consisting of a glyph (one of the twenty to the right) and a colour (one of twenty to the left). Sometimes, deciphering a spell will eliminate all spells bearing the same combination of color and glyph.
Reinforcing the Barrier[edit]
Xandra has protected herself, Hanso, and Brynn with a magical barrier. However, its strength is slowly being depleted as the Phantoms try to get in. If it should expire completely, Xandra will have to stop work on the ritual in order to help fight the Phantoms.
Players can restore the barrier by transferring the energy from defeated Phantoms into it. To do this, the player's active pet works in a team with three other pets. Two of the team must stabilise and contain the core contain long enough for the third to guide it to the barrier. If they fail to contain it, the core will explode and dissipate and the task must be started over. The fourth pet must suppress energy spikes that would stun the pets and prevent them from doing their tasks.
Players can either choose a specific job and be assigned to any team with a vacancy for that job, or be assigned to any job for any team. The following day, players became able to create their own teams and invite specific players on to them by sending them a code. Players in a group can choose which job they want, or choose to be assigned to any available position within that group.
The time allowed to players each round seems to be related to the barrier's current strength. Rounds are shorter (harder) when the barrier is strong, and longer (easier) when the barrier is weak.
Stabilization[edit]
“Click on the proper spell components above in order to keep the core stable. You must click on one component of each type (somatic, verbal, material) before clicking the 'Cast' button below them.”
For each turn, the player in charge of stabilizing the core must prepare a spell to do so. Correctly performing this job creates a "Stable" core and makes the Suppression job much easier. Failing does not cause the group to fail directly, but the Suppression player will probably run out of shields too quickly, creating a vicious cycle of stunned players. A stable core produces only one or two spikes per turn, while an unstable core produces up to three, and critical up to four.
Each turn's spell is composed of three parts: one somatic, one verbal, and one material. There are three choices for each of these actions, and the correct choice depends on the appearance of the core. Each of the somatic acts (the gestures) are coloured, and must match the colour of the energy around the core. The verbal actions vary in how loud the spell is: the bigger the orb, the louder the spell.
Finally, the different coloured powders for the material correspond to how bright the core is. If the core is clear with glowing cracks, it requires the white powder. If it is desaturated (grey), it requires the grey powder. If it is strongly colourised to look the same as the aura, it requires the black powder.

|

|

|
| The somatic components... | ||

|

|

|
| ... the verbal components... | ||

|

|

|
| ... and the material components. | ||
Once three actions have been chosen, the user must click the 'Cast the Spell!' button. This must be done before the time limit for that round expires.
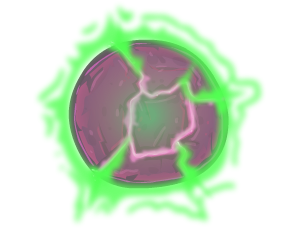
|
|
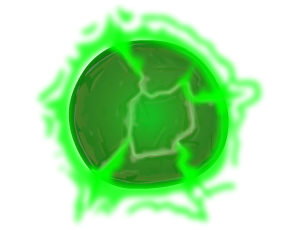
|
The URL for each core image corresponds to which three actions must be chosen. For example, the cores above are called (left to right) core231.png, core232.png, core233.png. They all require the second somatic option and the third verbal option, and from left to right require the first, second, and third material option.
Containment[edit]
“Click on a reinforcement spell above, and then on a sector of the containment field, in order to apply that spell to that field. You can apply one spell to each sector each round, but each spell has a one-round cooldown after being used. Once your spells are set, click the 'Cast' button.”
The containment field around the energy core is divided into six sections. The containment level for any section ranges from 0% to 100%: to maintain the shield, the sectors must be kept within "nominal range" - ideally between 50% and 70%, but may go between 40% and 80%. The containment levels randomly fluctuate each turn, and may increase or decrease.

The player has two each of six different spells at their disposal to influence the field. Of the six types, four of them add power to a section in varying strengths, and two of them drain power from a section in varying strengths. Only one spell can be assigned to a sector per turn, or sectors may be left alone. If a spell is cast in one turn, it can't be cast in the next one (but since the player has two of each spell, they may cast one version of one spell one round and the other version the next). The player must click the "Cast the spells!" button before time runs out for the spells to take effect.
If any of the sectors lie outside the 40% to 80% range, the containment field will begin to fail. The containment player is allowed only two turns in a row with any failing sector (even if the original sector is repaired, but another fails). On the first turn, the group sees the field strength as "Volatile"; on the second, "Rupturing". On the third failing turn in a row, the core will escape, and the entire group will see the following message: "The containment field decays, causing an explosion as the core bursts forth. After a few moments there is nothing left but a wisp of purple energy dissipating into the air. Xandra glares at you for a moment but goes back to her spellcasting. Perhaps you should try again." (Successfully placing all sectors back in the nominal range will set the status back to "Contained".)
Guidance[edit]
“Click on a strength level for each limb (left arm, right arm, left leg, right leg). You will push the orb toward the barrier with an amount of force based on how strong you push. Be careful of pushing too far, or you might fall down!”
Guidance involves navigating the core from its starting position 100m away from the barrier into its designated spot. The core, shown on a map, will tend to drift each turn in the direction depicted by an arrow. The pet chooses a stance by picking a strength for their left and right legs and arms, choosing between Strong, Medium, Weak, and None. (The Battledome strength stat does not matter.) If the pet pushes too hard, they will fall down and be unable to guide the core for the next turn. The guide can move the core about 10 meters on a good turn.

A pet can safely push with medium strength for three limbs and strong for the fourth. From that stance, they can then trade one level of strength on one limb for another on a different limb - for example, they can move a limb from medium to strong if they move another from medium down to weak. (If a pet pushes stronger than this, the pet will fall down.) Stronger pushes from the left move the core towards the right, and vice versa. Every limb pushes the core forward to some degree, as well.
The pet's pushes are additive with the core's drift indicated by the arrow - the results are the same as it would be if the core was allowed to drift first, and then the pet pushed separately with no drift. Thus it may be advantageous to imagine where the core would be after it drifts, and then decide on the most useful stance to take from there.
If the pet falls down and gets stunned on the same turn, the pet will be able to act on the next turn (so long as they don't get zapped by an energy spike as well).
If they player doesn't push hard enough for one turn, or doesn't push at all (due to being too slow to confirm their stance or stunned), the orb can slip further away from the barrier.
Suppression[edit]
“The core occasionally emits energy spikes which can stun you or your teammates. Click on the empty shield spots to put absorption shields in place where you think the spikes are likely to hit, then click the 'Lock' button. You replenish one shield per round.”

Every turn, a few small spikes appear in the circle of energy around the core. The next turn, these spikes lurch out and try to zap members of the team, stunning them for a turn. The player responsible for suppressing these spikes must cast shields around the team members to anticipate where the strikes will hit.
Spikes may go directly at, towards the left side, or towards the right side of a player, as indicated by the angle at which the spike forms. Each team member may have a shield placed in front of them, to their left, or to their right, corresponding to where the strikes may go. The shields absorb any strike that hits them in the next turn. Shields are assigned by clicking the spaces in front of the team members, and then clicking the button to lock them in place.
The results of the previous round are displayed simultaneously with the spikes for the next round. Thus, identical strikes cannot happen two rounds in a row, since the image of the shield blocking the strike is being displayed. For example, if one blocks a spike directly at the a player, one will not need to block another one the next turn, while the display of the block is still there. However, a spike may still form to the right or left of that player, and these may be difficult to notice with the image of the strike right next to it.
The player starts out with ten shields to assign, but only regenerates one per turn. If the player performing Stabilization does not do well, the player will rapidly start running out of shields, and will need to prioritise which players don't get hit: The Containment job is usually the most critical, while delaying the Guidance job does not have any effect on the rest of the group other than delaying completion of the puzzle. The Stabilization job assists the Suppression job, and, of course, one's own Suppression job is needed to prevent random players from being hit the next turn.
Fearless Deeds[edit]
- The Plain of Peace - The ritual is underway, but the heroes will need a great deal of help if they are to stop Faerieland from sinking further! Join them now to help Xandra complete the ritual, and to protect her, Hanso, and Brynn from the terrible shadow phantoms.
- Take part in the puzzles.
- Errand Spelling - It's so handy having thousands of minions every time something puzzling comes up.
- Complete a barrier and a spellbook puzzle.
- Cast Away - Everyone gets an achievement! Even this inanimate carbon rod!
- Awarded from some ritual-related plot pages (including the ritual page) after Xandra finished casting 10 spells. The award message does not always appear.
- Jack of All Stations - I swear, if I get stunned one more time...
- Complete at least one barrier puzzle in each of the roles: Stabilization, Containment, Guidance, and Suppression.
Artefact Battle[edit]

|
In this step, Hanso is trying to escape from Xandra, but she is pursuing and firing magic at him. Hanso can use the smaller artefact to absorb the blasts, and the player must help him absorb as much of her magic as possible.
Every round Xandra will fire another spell at Hanso, and Hanso must survive five rounds for the user to complete the puzzle. However, the artefact can only hold a certain amount of energy - if the artefact energy absorption passes 100%, the puzzle is lost.
“The artefact absorbs more energy than it can safely hold! Hanso is flung through the air as the energy is released all at once, nearly frying him to a crisp. You'd better try again.”
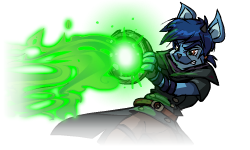
|
Also, a spell of 40 or more percentage points in one round will overload the artefact immediately, and the player will lose the puzzle no matter how much capacity remains.
“The artefact absorbs too much energy at once! Hanso is flung through the air, barely managing to hold onto the artefact. You'd better try again.”
Every round, Hanso can goad Xandra with an insult from a list of ten (randomly selected from 20 possible). Each of the insults themselves have a certain impact on the witch's ego. Lighter insults make Xandra launch weak spells, while heavier insults cause her to launch stronger attacks. Being a powerful witch, insults at her magic or comparing her with Faeries tend to be the most offensive, resulting in a deadly attack. On the other hand, juvenile insults add little power, and can even reduce the impact. The player cannot use the same insult twice in the same play-through.
Besides Hanso's insults, Xandra's attack power depends mainly on which incantation she chooses, the most powerful of which contributes 19 percentage points of power. Also, the player must keep an eye on Xandra's temper; the angrier she gets, the louder she casts her next spell, and the more powerful her attacks become.
With each round, the distance between Hanso and Xandra changes randomly between around 10 metres up to 50 metres. A shorter distance creates a slightly stronger impact - 0.1 percentage points per metre less than 50.
In each successful puzzle, the total magic retained by Hanso's artefact is added to the energy absorption gauge at the top of the page. This is a collaborative step: the gauge reflects all of the magic every player has sapped from Xandra. The most energy the current player has absorbed in one (completed) puzzle is recorded at the bottom of the page. After the puzzle is completed successfully, the player is urged to complete it again:
“You managed to block all of Xandra's shots without overloading the artefact! You'd better keep moving, though. Xandra doesn't look like she's about to give up.”
The formula for calculating the strength of the spell is:
![]()
Where d is the distance, l is Xandra's loudness, x is the value for Xandra's incantation, and h is the value for Hanso's insult. The tables for these values can be found below:
| Xandra's loudness | l |
|---|---|
| Mutters | 0 |
| Says | 1.5 |
| Shouts | 3 |
| Screams | 4.5 |
|
|
Fearless Deeds[edit]
- Xandra - Xandra, having revealed her true nature, tries to entice Hanso into joining her in ruling Neopia. Will he give in, or try to free Neopia from Xandra's control? Meanwhile, Brynn faces an old foe once again...
- Complete the puzzle.
- Triumph - How appropriate. You fight like a kau.
- Use all the different insults at least once. It doesn't matter how many puzzles the player needs to play use all the insults, and insult used in failed puzzles count.
- Over 9000 - What, are you in a hurry? Because clearly we're not.
- Lose the Artefact Battle with the "artefact energy absorption" gauge exceeding 100% in exactly three turns. If the artefact overloads because of a spell greater than 40%, it does not count towards this achievement.
- Supercharger - You must have taken Insults 101, because you're pretty good at this. No, seriously, I mean it. I'm not being sarcastic. No, really. Why are you glaring at me? *sigh*
- Finish the entire Artefact Battle puzzle three times in a row. Failing the puzzle will break the streak.
Oblivion Returns[edit]
At the same the battle with Xandra was released, Oblivion returned to the Battledome. This time he has 1,000,000 hitpoints instead of his 10,000,000 hitpoints in his first appearance. The weapons that he possesses remain the same though. Because of this, participants have another chance to get the Fearless Deeds related to him (see above).
Prizes[edit]
The official plot solution was released on the 13 January 2011. On 22 January, The Neopets Team reported that the prizes had been drawn and scores calculated, although they were still balancing the prices for the prizes. They estimated the prize shop would be released the following Wednesday - in actuality, they beat their estimation by one day.†
| Trophies | ||||||
|---|---|---|---|---|---|---|

|

|

|

|

|

|

|
| Saviour of the Faeries | Artefact Eradicator | Master of Insults | Smarmy Hero | Wraith Puncher | Unpaid Library Intern | Petrified Pie |
Visiting the prize shop awarded all participants with a trophy for their User Lookup, a The Faeries' Ruin site theme and the Ruined avatar. At the shop, there were 33 different prizes that could be purchased with the participant's plot points. Spending plot points on prizes does not result in a reduction to their score as recorded by their trophy.
|
|
|
Neocash activity[edit]
The Faeries' Ruin is the second plot to include an additional Neocash element, after the previous year's Atlas of the Ancients. As in the previous plot, The Neopets Team reported that "it in no way affects your plot score."
Users can buy Key Packs using Neocash that supply keys used to enter the Corridor of Chance in Castle Nox. Each key purchased allows one use of the Transfabulator found there. The Transfabulator returns an item the user's Neopet is wearing to the Closet and replaces it with an exclusive wearable in one of four colors. It may also grant the Neopet an effect, which lasts for five days.
Once the lever on the Transfabulator is pulled, the key used to enter the Corridor is used up.
Behind the scenes[edit]
- After the release of the first chapter, a meme began on the Neoboards as to the fate of a pie, which had also been petrified along with the faeries. This was referenced in Lenny Conundrum round 375, Random Contest number 201, and the Neopian Times Editorial number 462. Ultimately, a stone pie was released as a plot prize.
- The Faeries' Ruin plot was chosen as the Best Plot in the 3rd Annual Neopies - although it was the only nominee in that category.
- Via the Neopets Facebook page, TNT posted the story of how plot puzzle programmer Mr. Insane grew a beard until the end of the plot. As TNT tells it, he had half-shaved it before he was stopped because the prize shop was still unfinished, and could not shave off the rest until he had completed it.
Site changes during the fall[edit]
Several site elements were altered during this plot:
- Although the Faeries were petrified, the Healing Springs had some "residual magic" to be used at the user's own risk. Before the release of Into the Fray, if the user tried to "Heal my Pets", they were told there was no-one there to heal them; during and after Into the Fray, it generated one of the Water Faerie's item events - either a low level snowball or a healing potion.
- The shops both at the Healing Springs and the Hidden Tower remained open without their owners present, presumably relying on an honesty-box system, even after Faerieland crashed. New items were released as normal: the Maractite Paint Brush began to be sold at the Hidden Tower on the same day that Faerieland crashed.
- The Soup Kitchen was still usable during the plot, as the Soup Faerie had made an extra large cauldron of soup.
- Beginning around 10 November, the height recorded on Faerieland's main page dropped from 10,000 feet to 9,000 feet in line with the events of the plot. It had dropped another 1,000 feet by the 15 November, and another by 18 November. It was down to only 3,000 by the 23 November - Oblivion's release date. Later on that day, it was down to 2,000 feet, and by the 24th it was at 1,000.
- By the end of 24 November, the description on Faerieland's main page was gone, replaced by a link to the picture of Faerieland crashing to the ground. At the end of the plot, the map was remade to show that nearly all the activities and damaged infrastructure were being rebuilt in a lush landscape on the ground, and most activities were accessible again with new art - an exception was the Faerie Quests, which remained closed during rebuilding until 7 February. Faerieland was never rendered inaccessible at any point of the plot.
Cameos and references[edit]
The titles and descriptions of the Fearless Deeds often contained jokes or references to other media. These are linked to in the walkthrough above. Additionally:
- Reference was made in the plot to the fate of The Darkest Faerie.
- Both this plot and the video game Neopets: The Darkest Faerie had the scene of Faerieland dropping to Neopia.
- Captain Rourke made a cameo in chapter three as a patron at the bar.
- Kanrik made a cameo in chapter seven in a flashback as one of the people Hanso robbed.
- The foyer of the Brightvale Archives has Roman numerals hidden in the design, including an 'X' on the floor. This may be a reference to the similar scene in Indiana Jones and the Last Crusade. Also, in the eleventh chapter, Hanso mentions swapping the artefact with a bag of sand, referencing the famous idol swap scene in Raiders of the Lost Ark.
- The Neopets in the Wraiths' Cavern have names from the ICAO spelling alphabet (aka the NATO phonetic alphabet) - Charlie, Mike, Oscar, and Victor, meaning the letters C, M, O, and V. Kali's name is not in the alphabet - but it is very close to the keyword for K, "kilo".
- In the Archives step, the orange Meowclops symbol was originally thought to be an orange cat (i.e. Garfield himself) - this was repudiated by the official solution to the plot.
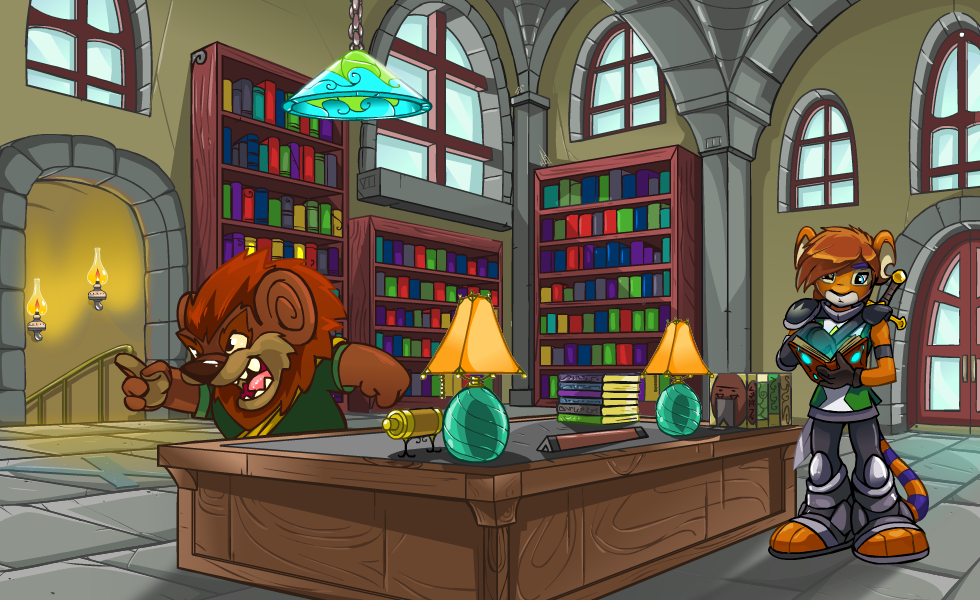
Goofs and inconsistencies[edit]
- The Commonwealth English spelling of artefact is used throughout the plot, although artifact is used elsewhere on the Neopets site.
- Some faeries were not shown as petrified during the plot, including Siyana of Altador or Bree the Keyquest Faerie, this was not a clue but an oversight.
- The Ogrin is never named at any point during the plot - and he was simply referred to as "The Ogrin Master" in the epilogue.
- In the Games Master Challenge 2010, several qualifying games were unavailable since they were set in Faerieland. However, there were no challenges that required those games to be played.
- No statue is shown to have fallen over after being petrified - even ones in the middle of movement (walking, dancing, battling, etc.), even though it would be very unlikely that they would have been balanced enough to stay on their feet at the moment they were frozen.
- Even after the Water Faerie returned, the Healing Springs still failed to grant anything other than items until the first workday of the new year (3 January 2011).
Notes[edit]
† The prize shop was released on 25 January NST, although the related New Features entry forward-dates this a day.
External links[edit]
- Plot page: The Faeries' Ruin, The Faeries' Ruin - Into the Fray
- Plot locations: Xandra's Library, Nox's Castle, The Finneus J. Scrollbottom Auxiliary Surplus Archives, The Wraith Caverns
- Plot Solution: The Faeries' Ruin - Solution
- Castle Nox - Corridor of Chance Help
- Balthazar discovers the Faeries Ruin